Why should I use Zoho Forms?
Sometimes the form builder already on your website just isn’t good enough. Maybe you need to add some logic and even a calculation into your form. What if you want a simple form, but it also needs to take payments as well.
You can do all of these things with Zoho Forms and more, such as:
- Capture new enquiries from your website
- Build a mailing list
- Collect customer feedback
- Creating online surveys and quizzes
- Build cost calculators for customers and employees
But why do you need Zoho Forms when there’s already CRM Forms?
This is often the first question I get asked because having two form tools from Zoho confuses lots of people. But it’s easy to understand once you know the difference.
Zoho CRM webforms is a cutdown version of Zoho forms that can only handle simple one-page forms with no formulas or complex fields. It certainly can’t handle “show and hide” field logic. It’s the simple option if you’re pushing data straight to Zoho CRM.
Zoho Forms provides more control over the form, and you get a lot more features, formatting, and design options.
So how do you use it? Glad you asked…I’m going to run through how to create a simple form.

Creating a new Zoho form
Step 1 – Create the form
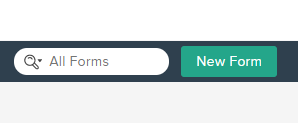
Go to forms.zoho.com and press New form in the top right:
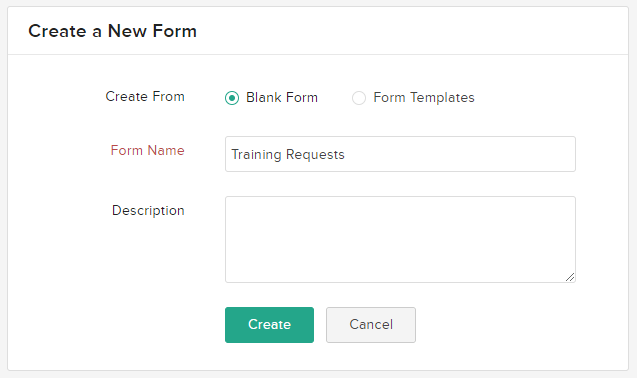
Pick whether you want to start with a blank form or start with a template.
Use the Blank Form option if you already know what you want to make. You can use the pre-built templates to give you some inspiration. I’m going to pick the blank form to show you the full process.
Step 2 – Give it a name
Give your form a name and make it a descriptive name because you may create many similar forms, so don’t just write form 1, form 2 etc.
If you need to give it a description, you can add some more information in the description box. This is useful when you work in a team, and you need to provide more information so your teammates can understand what the form is for.
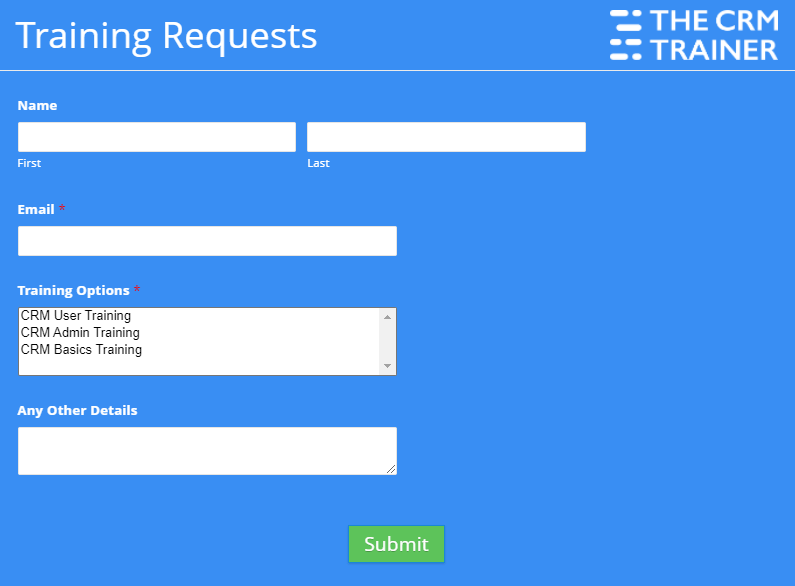
I’ll call my form Training Requests and press the create button to begin.
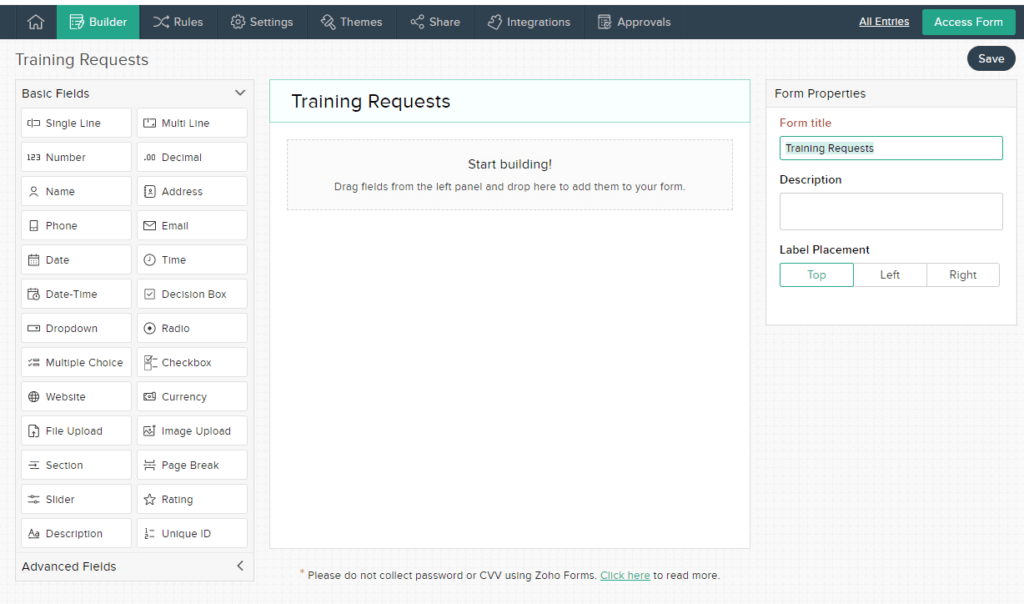
Step 3 – The form builder
Now you get to the Form builder page. On the right, change the title of the form and choose where this title will be positioned.
Make sure when you’re building your form that you save regularly.
The top tabs of the form allow you to access the different parts of the form, such as:
- Show and hide field rules
- Adjusting the settings
- Changing the design
- Sharing and integration
But let’s start with building it first.
On the left-hand side, you’ll see the fields available to use in your form. They’re separated into basic and advanced fields with the basic fields being standard data capture field, and the advanced fields having special features.
Step 4 – Drag and Drop
Start by dragging the fields you want in your form from the left side.
I’ll make a form so site visitors can request my training courses and I can notify them when they’re available. I want to capture their name, but rather than using the single-line field to do that; I’ll use the Name field instead.
Now that I’ve selected and dragged the field in, I get options for the field. These field properties change based on the field type I’ve dragged in.
Step 5 – Field properties
You can change the name of the field in the field label. If you want to change the formatting of the label, select the rich text option which gives you the “edit field label” pop-up so you can change the formatting such as the label colour, size etc. You could even insert a hyperlink to another website.
Press Done on the pop up when you’re finished formatting. Below the label, you can add some instructions. This isn’t necessary for a field like “name”, but for some fields, you may want to provide some instructions to whoever will be filling it in.
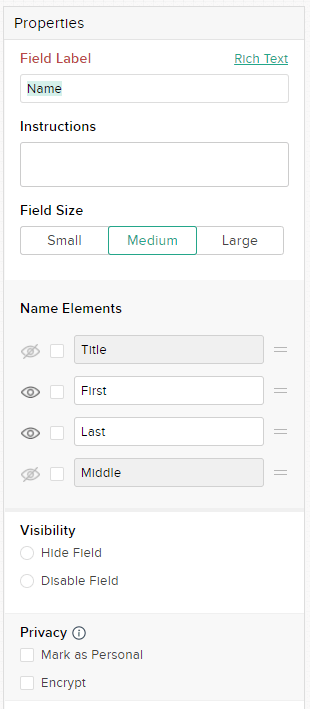
When choosing the field size, I tend to keep the default medium, but it depends on your design.
Some of the fields types have additional options. For example, the name field allows you to also capture users title and middle name. You can even set it so that they can enter their full name into a single box.
The visibility section allows you to hide the field. When you hide a field, it will give you the option to add a default value. This is not useful for the name field but is useful for picklists. A good use for this is to hide an identifying field which allows you to take the value into an integrated app such as Zoho CRM.
The privacy section allows you to specifically tag a field as holding personal information. Marking it as personal can restrict its usage in other locations, such as exports and integrations. You’ll be notified about the personal data if you need to move the record out of the form.
You can also encrypt the values in the field too. This means that the data in those fields will be masked when you export the data. Be careful what you pick to encrypt.
Step 6 – Special field properties
It’s always a good idea to capture an email address field as it’s generally a unique field per person. The email field allows you to exclude certain domains or only allow email addresses from specific domains, such as your organisation’s email domain. Useful if you’re creating an internal survey or service tool.
If you want to stop people from filling in the form twice with the same email address, use the “No Duplicates” tick box in the validation section.
You may have noticed that in some forms on other websites, they ask for the email address twice to make sure they match up and that you entered it correctly. If you select “Include email input confirmation” it will add the two email fields to your form.
Some fields give you the option to enter data using QR codes and barcodes. While they can be useful for mobile forms, they don’t make sense for an email address field.

As you’d expect, the multi-select picklist field allows multiple options to be selected. Give it a descriptive name for the field label, then add your choices. Use the plus (+) button on the right of the choices to add additional options, remove them with the minus button (-).
In the advanced drop-down, you can import values if you don’t want to add it manually. You can also copy the options and even assign number values to the options so you can use a formula field to generate a score.
Deleting and cloning fields
When you mouse over a field, you’ll see the trash can icon near the bottom of the field. Be careful if you’re deleting a field on a form that already has data in it. You could lose that data.
Mousing over a field also gives you the option to duplicate the field as well. Press the clone button to create an identical field.
What field types can I put on my Zoho forms?
I have built a basic form above with only a few fields but there are more fields available. Let’s have a quick look at these:
I’ve built a basic form above with only a few fields, but there are more fields available. Let’s have a quick look at these:
- Single-Line and Multi-Line – these are unstructured data fields where you can ask open questions. The respondent can write anything in it. There’s a character limit that you can set yourself.
- Numbers and Decimals – this only allows a number in the box. Number fields can be used in the formula field for calculations.
- Address and Phone – these are standard fields that allow you to capture location and contact information.
- Email Address – this captures the respondent’s email. It’s an important field and is considered an essential field for most types of forms.
- Date, Time, and Date-Time – if you are using the form to capture a calendar booking, have a look at Zoho bookings which is designed to integrate with your calendar.
- Dropdowns, Multiple Choice, and Checkbox – a drop-down allows the respondent to select one option from a pre-filled list, the multiple-choice and checkbox allows them to select multiple options.
- Decision Box and Radio – this is a variation of the dropdown box and allows the respondent to see all the choices as if they were separate fields.
- Website – this allows the respondent to enter a URL into the box.
- Currency – this is a financial amount field, and you’ll need to specify the currency type such as GBP or USD, etc.
- File Upload and Image Upload – allow the respondent to upload a document or an image as a response. The maximum file size can be 20MB, and you can allow them to add up to five files into the field.
- Slider and Rating – allow the respondent to provide an answer along a scale, you can set the scale yourself.
- Description – the description field allows you to write instructions for the respondents or provide an explanation about the fields.
- Unique ID – allows you to automatically number each form entry, so they all get a unique reference number. This is a good idea if you want to follow up on the form entry with the respondents.
- Sections and Page Break – these are layout elements rather than fields. The section allows you to group fields together, and page breaks allow you to create multiple pages in your form.
- Payment – take payment from your form. You never want to do this manually using your own fields, so use this field connected to a payment gateway because it’s PCI compliant and secure. You have options such as PayPal and Stripe included.
- Zoho CRM – bring in a value from your CRM system to the form. Make sure you check the field mapping if you want it to be pre-filed from the CRM.
- Formula – use the number, weighted value, and currency fields in your form to automatically calculate an amount. You can use this for all sorts of purposes, including creating a quoting tool. You can even take the output of the formula field as the amount for the payment field.
- SubForm – a subform is another layout type and not strictly a field. It allows you to add additional fields to your form.
- Matrix Choice – another layout which allows the respondents to fill in the fields against two axes. It’s similar to a multiple-choice test.
- Image Choices – similar to the matrix choice but allows you to add images rather than text as the options.
- Signature – allows the respondent to enter their name, and it’ll be translated into a signature. This is usually for forms that are acting as contracts.
- Terms and Conditions – allows you to inform the respondents about what they are signing up for and ensure they agree with the terms before submitting the form. In order to make this work, you must make the field mandatory, so they have to accept it.
Rules, rules, rules – adding rules to your form
Field rules
The field rules allow you to show and hide fields based on the values of another field.
- Press configure now to create a new rule.
- Give your rule a name, make it descriptive in what it actually does. Such as “show the description box if the value “user training” is selected in the course picklist”.
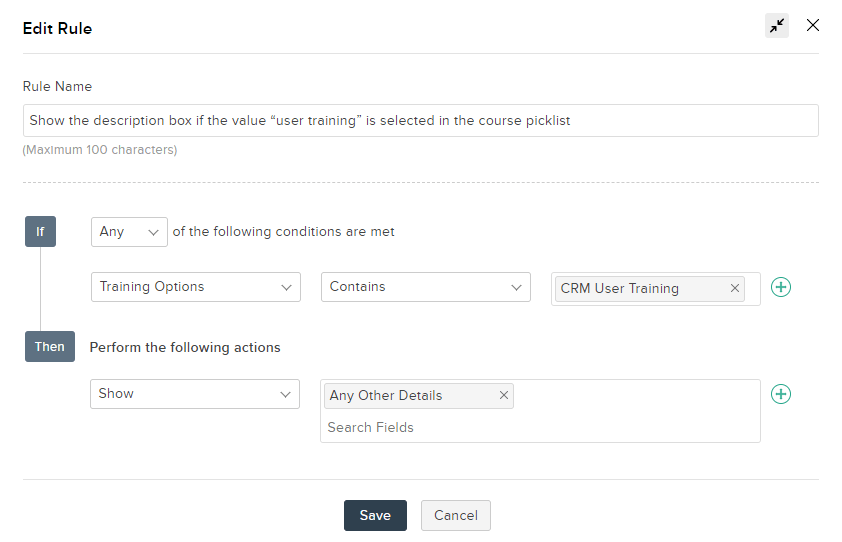
- The rule uses an “if this then that” approach, so set the fields for the conditions, you can pick multiple fields if you want.
- Once you have set the condition in the “If” section, set the action in the “Then” section, either to show or hide fields. I am going to show an “Any Other Details” text field if they select the CRM User Training in my training options multi-select picklist.
- Press add when you are done.
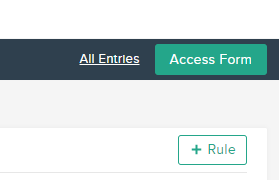
- If you want to see how the form behaves, press the Access form button in the top right corner of the screen:
Form rules
The form rules allow you to set what happens when a form is submitted or updated.
When a new form is submitted you can configure the form to notify you or even set a task depending on what fields are filled in or what specific values are.

It works the same as the field rules. First, fill in the name as descriptive as you can, then set the If criteria rule, after that change the Then rule as the action you wish to do. Hit Add when you’re finished.
The same options are available if the record that is created from a form entry is manually edited by a user.
Page rules
Page rules are quite simple. They are based on the same “If this then that” logic, you can set specific pages to be visible based on how the respondent fills in the fields. This is useful if you want to create dynamic forms that change based on what the respondent is entering.
The page rules are only available if you have three or more pages in your form. To create a page, select it from the form builder options.
After building any rules, make sure you access the form to see if it works as you expect.
Configuring the Zoho form settings
There are lots of settings for your form so I won’t go into too much detail about each setting here as most of them are self-explanatory.
General settings
The basic settings in the general setting tab allow you to do a few things such as:
- Change the name of the submit button on the form and hide the form header.
- You can change the date and time zone that your form is in.
- Set whether you wish to capture the location of the respondent when they press submit on the form. You can also choose to capture their IP address too.
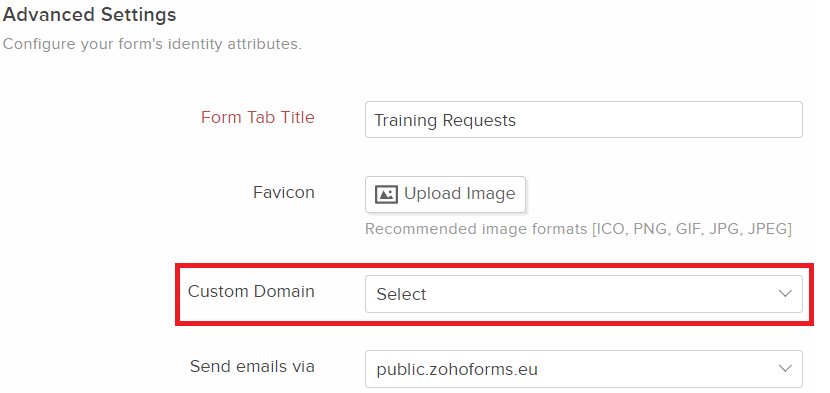
- In the advanced settings, you can rename the tab for the form and set a custom favicon too.
Spam control
Now that I have my basic form, I will want to make sure that it is only being filled out legitimately and not by spammers:
- Select a Captcha.
- You have multiple options and they are changing all the time.
- There is a Zoho forms captcha which makes you fill in a series of letters and numbers into the box to submit the form, this can be a barrier to submitting the form.
- The Google options are generally better, to use them, you will need to register directly with Google’s reCaptcha service in order to use it. https://www.google.com/recaptcha/about/
Delimiters
The data that is captured in certain fields such as the name and the address is stored together in a single field. In order to separate the different parts such as the first name from the last name, you can select a delimiter. A comma is usually sufficient unless you plan to use CSV file exports, then use a semicolon or another delimiter. Don’t use the space.
Review before submission
This setting allows you to provide the respondent with a summary of their answers before they submit it. This is only useful for multi-page forms. It doesn’t make sense to do this in a short form.
Acknowledgements and redirects
After the respondents have filled in the form, you can show them a thank you page and even redirect them to another web page if you want. Also, make sure you select the Google Analytics or Facebook Pixel tracking code so that those services can also track the form submissions if you are using them.
Email notifications
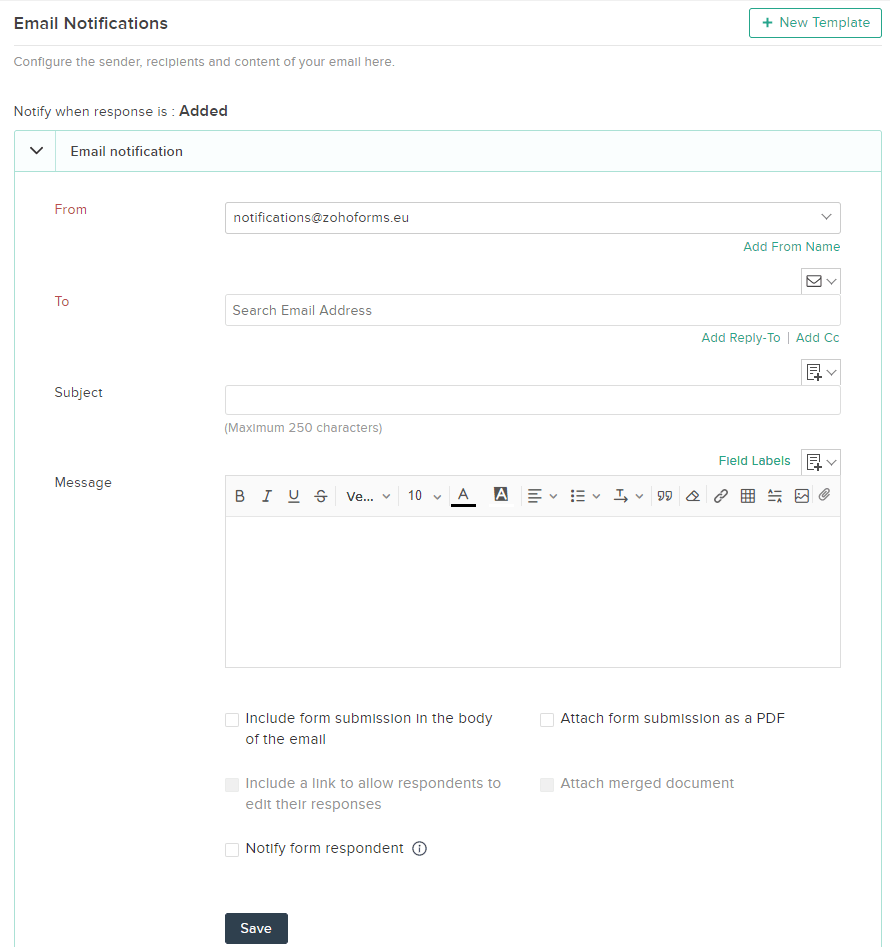
When a response to the form is created or added, you can set up an email to send out to either the respondent or an internal notification to you or your team:
- Choose the “from” address, the “to” address can be picked up from the email field in the form or you can manually enter it as someone else if you do not want to send this to the respondent.
- Add the subject and the message, you can use merge fields from the form entry itself.
- You have some options at the bottom to include the form submission as an attachment or in the body of the email.
- Press Save when you’re done.
SMS notification
The SMS notification works the same way as the email notification. It can notify someone if they put in a mobile number into the phone field or it can notify your own mobile phone.
In order to use it you must first sign up to an SMS provider, there are a few options available, but once you have linked your account up with Zoho forms, you can use it to send out the SMS message.
Save and resume
If you want respondents to save their response before they submit it, perhaps your form is quite long or requires more information on a multi-page form, then you can allow them to save their progress and resume it when they are ready. Make sure to save the change if you do enable this.
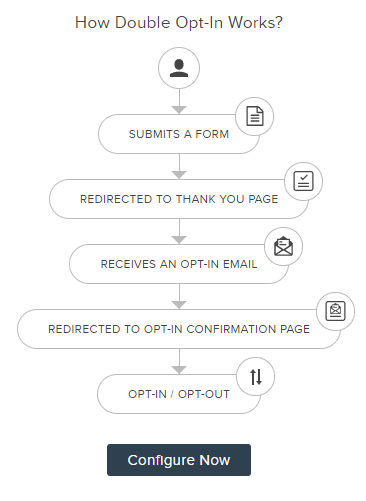
Double opt-in
If you wish to make sure the respondent is committed to receiving communications from you, for example, the form is for a sign up to a new service, you can use the double opt-in to confirm their interest. Any workflow triggers and notifications will not be fired out until they have received an email and clicked the link to double opt-in. This allows you to only receive serious submissions.
Form span
You can restrict people from submitting the form in a few ways:
- You can restrict access to the form with a date and time.
- Restrict the total number of form entries, useful for a competition.
- Prevent people from filling in the form from the same IP address
- If you allow multiple people from the same IP address such as a household to fill in the form, you could restrict the submission to one per respondent too.
Response settings in Zoho Forms
If you want to allow submissions to be edited after they have been submitted by the respondents, you can set it in the response settings. You can even set an expiry date for how long they have to update their submission. This ties into the update records in the notifications and rules.
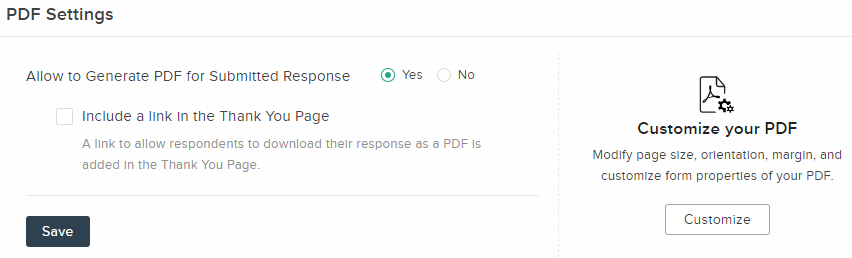
PDF settings
You can also adjust the pdf template that is created, well at least some aspects of it, such as the size and margins.
Document merge
You can take the responses and fill in custom mail merge documents so that it saves you from copying and pasting the data. Zoho Writer is Zoho’s word processor and does a lot of cool things and is free, so use that first before trying anything else.
Custom messages and field alias
There are plenty of messages that your form can display to the respondent. They are all a bit generic, so customise them in this setting to be specific to your needs. This includes the generic field type instructions that show up.
A field alias is a different field label to the one you have on the form, you can use different field aliases to pre-fill the fields from the URL, also known as UTM tags.
Manage form attachments
Make sure you store your form attachments such as images and file uploads in a cloud storage service so they can be easily retrieved later. I suggest using Zoho Workdrive because it gives you a huge 5TB to start with. Other services are available such as Google Drive, Microsoft One Drive, and Dropbox.
Task permissions and filters
If you create an automation to generate a task for a user after a form is submitted, you can set which fields you want the task owner to be able to edit. You may not want them to edit any fields after it’s been submitted.
The filters allow you to set which dropdown and radio fields are used to filter the records after they are submitted.
Customising the look and feel of the form
The Themes tab allows you to pick from a list of template designs for your form or to create a new one. Let’s look at creating a new one.
- Press the Customize Form button
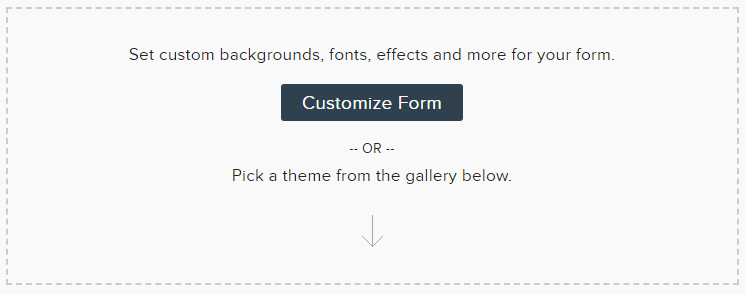
- Select the element of the form you would like to change in this drop-down box.

- It will then come up with options for configuration and formatting. Play around with the form. If you make a mistake and can no longer fix what you have done (we’ve all been there), press the “restore theme defaults” button in the top right.
- Once you are happy with your form design, you can press apply in the top right corner to make the changes to your form.
The theme and changes will adjust for a mobile view so make sure your happy with the way it does this by pressing Access Form and shrinking the browser to see how it adjusts on the page.
Once you have applied the changes to the form you can press the cross in the top right corner. Then mouse over your custom theme on the right and press save if you wish to use it again.
Deploying your Zoho forms
Once you are happy with your form, you can start sharing it and adding it to various locations.
You have a few options to do this:
Sharing via a link
You can use Zoho forms to host your form and just provide a link to it. This is what most casual users need. You can even set up tags inside the URL used to share it using the “track referrals” and “Prefill Form Fields” option if you would like.
You can even share the form on social media using the social buttons at the bottom of the page.
If you wanted to share this internally in your organisation with Zoho users, then you can use the “share with specific users” or “all users” to allow them to see the form. This isn’t the same as giving them editing rights to the form.
Embedding the form
This is the most likely option for organisations. This means the form will be available on your own website.
You have multiple ways of doing this. If you want to retain a lot of the special features in your form such as field rules, then use the iframe or javascript method.
However, if you would like to use a plugin inside a website builder which is usually a better idea, you should use the website builders option and add a plugin to your website to see the Zoho form on the site.
If you want responders to go directly to the form rather than showing the form on your website and using the public link, you can use the Hyperlink option. If you want to share it with mobile users, then QR codes work very well. A good example of this has been venues creating a track and trace form and putting QR codes on walls so visitors can log their visit.
If your form uses simple fields and you are comfortable modifying it the form code, then select the HTML and CSS option. Be aware that it only supports specific field types and no special features like sliders, payments, and formulas for example. Press the “download HTML/CSS” to get the code and then modify it. Also, note that only certain parts of the form can be changed otherwise you could break the form.
Personally, I would pick the website builder option but I’d pick the JavaScript option if I was giving it to my web developer.
Track Entries and Email campaigns
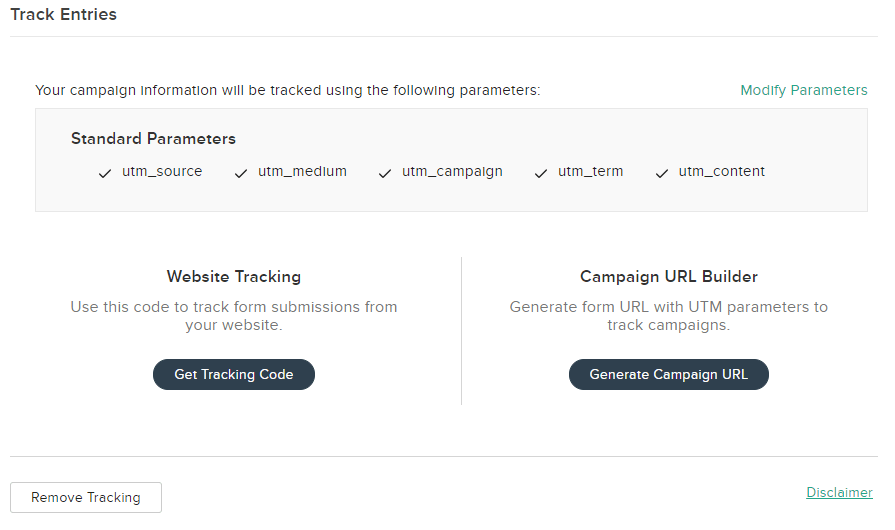
Once you have chosen how to distribute the form, then make sure you set up the tracking. Tracking is done using UTM tags. UTM stands for Urchin Tracking Module. These are codes attach to your URL that allows tracking applications to read the data. For example, Google Analytics uses these tags to understand details about your form.
Press Get Tracking Code to get the code to add to the footer of all your webpages before the tag. Use a plug-in to help you add the code if you can not do this yourself. If you are tracking using Google Adwords, make sure you use the Advanced tracking code, not the basic one.
If you want to track which email campaign or even which button someone clicked to get to the form, click the “Generate Campaign URL”. It will pop up with the campaign information, fill in the fields such as source, channel, etc. this will append to the URL. You can create multiple campaign URLs, all with different campaign information so you can place the URLs in different places to see how people are getting to the form.
If you want to use the prebuilt integrations of Zoho Forms into Zoho Campaigns or MailChimp for broadcasting your form via email, then use the options in the email campaigns section.
Integrations
When someone submits a form, the data will reside in Zoho Forms, however, if the form is part of a process such as new business generation or creating tasks in a project, then you will need Zoho Forms to integrate with other apps.
The most common type of application Zoho Forms integrates with is a CRM system, either Zoho CRM or SalesForce are the immediate options available. If you wish to connect with another CRM system, then you will need to use an integration platform such as Zoho Flow or Zapier.
Zoho Forms to Zoho CRM integration
A CRM integration allows you to create a new record in the CRM from a Zoho Form entry. You will need to map the Zoho Form fields to the correct CRM fields.
Let’s do a Zoho CRM integration to show you how easy it is:
- First press configure to get to the integration page. Then select the module you wish to integrate into, I’ve picked the Leads module. Select the Layout, I generally don’t use layouts in the CRM, I prefer using layout rules so the majority of my systems only have one option here.
- Then select the fields that need to be mapped between the CRM and Forms. Select the field on the left from the CRM side and match it to where you would like the values to come from on the right when a new record is created.
- Press the plus (+) button to add as many fields as you need to. Once you are happy, make sure you tick a few of the boxes underneath.
- In the Actions section, select the Automation and Process Management check box so that any workflows in the CRM will trigger when a new record is added to it.
- Select Attachment and signature to ensure these also get added to the CRM.
- Use the GCLID option so the Google Click ID for Adwords gets transferred across.
- Also, press the upsert record, if there is already a matching record in the CRM, then the integration will update the existing record with new details from the form (it uses the email address as the default to check it already exists).
- If you were using assignment rules in the CRM, then make sure you also press this because otherwise the assignment rules engine won’t get triggered.
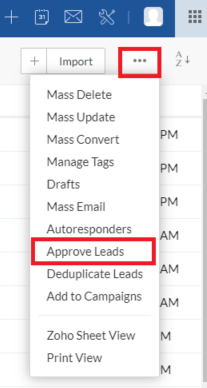
- You can also send the records into a special approval list rather than entering it into the main CRM list view. To access the lead approval list go to the CRM Lead module list view and select the ellipses on the right and choose the Approve Lead option.
- Once the records are in the CRM, you may want to track them with a field value. If you did not map a hidden field with a default value, then you could use a tag. Check the box Tag Records to tag to the form record in the CRM.
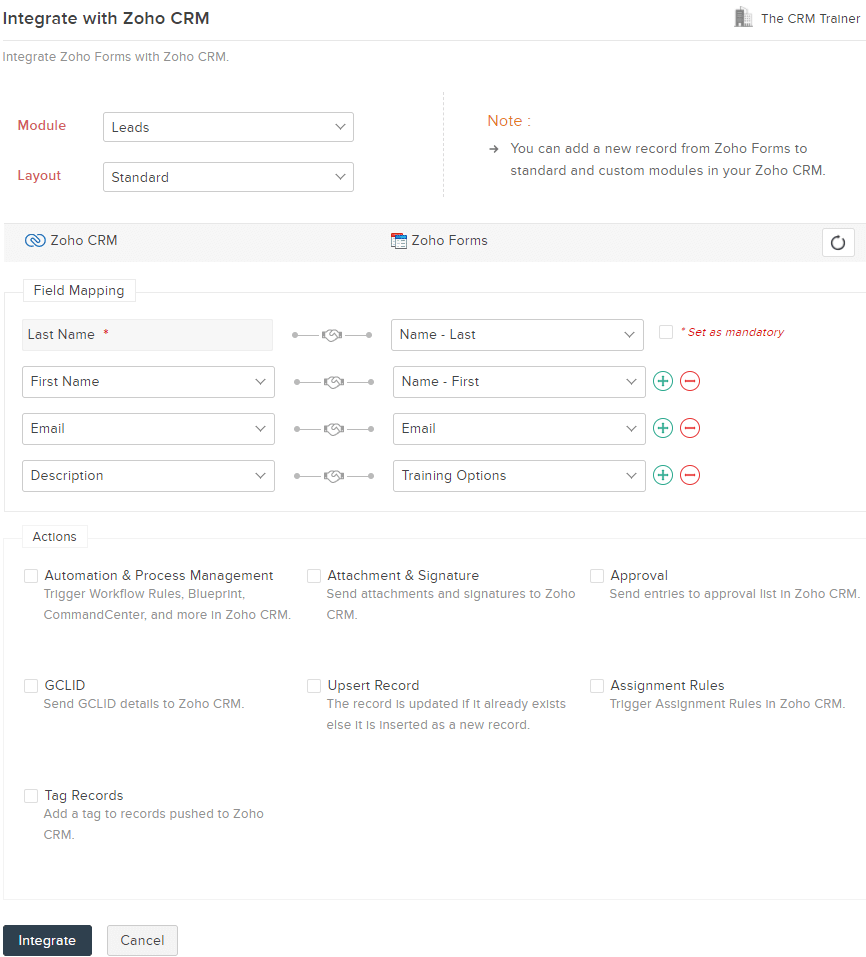
- Once you have done this, press Integrate. Make sure you test it by filling in the form with a dummy entry and checking if the record is created in the CRM. If there are mandatory fields in the CRM, this could block the integration.
Approving form entries
The approvals feature is quite simple, You can create multiple approvals of form submissions. This isn’t commonly used in many organisations, however, if you need multiple people to see a form submission before it is created as an official record, then you can create an approval chain for them. To create one, you must use the email address of the approver(s). I will not be going through the approval process for a form entry here as it is quite straightforward and not many people have used it on forms that I have helped clients with. They usually write the record into the CRM system, either as a lead or a custom module, and then use a staged pipeline picklist field to manage the approval process. You can even use the approval process or blueprints in the CRM to achieve the same outcome.
Viewing the entries
Once your form is live and you have distributed it, you will want to view the entries. If you have integrated your webform with your CRM, great, you can see all the submissions there.
If you have not integrated it with the CRM or any other app, then you will need to go into Zoho Forms to get the list of form entries.
Find the form and select the “All Entries” button.
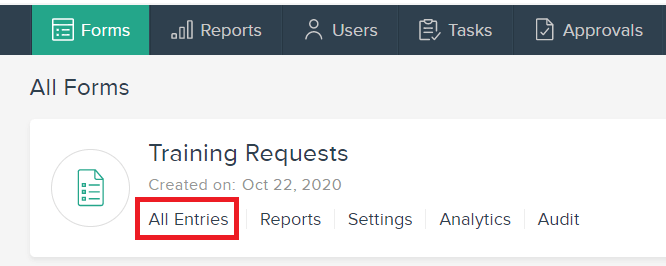
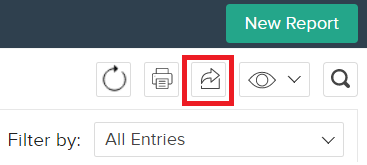
This will take you to a list of all the form entries. You can export these entries from the export button on the right. You can even filter them by time or whether they were partially filled using the drop-down on the right.
Reporting on the form and form analytics
If you want to slice the form data up, you have 3 options:
- Create a report inside Zoho Forms
- Use the basic Form Analytics
- Integrate Zoho Forms with Zoho Analytics
- Export the data and open it in a spreadsheet
Zoho forms report
Creating a report within Zoho forms is quite simple:
- Select your form and press reports.
- Then press the button “create a new report”.
- Give your report a name, make it descriptive.
- You can adjust the date and time zone, press save.
- Let’s create a filter for the report, go to the “Custom Filters”. For example, I will select only entries that have requested user training.
- Press “configure filter” and select the field you wish to use, then select the operation you want such as is, isn’t, contains, etc. In the right box select what the value should be.
- You can add more filter criteria if you want, use the green plus (+) on the right. Press save
- The auto filters turn the drop-down and radio buttons in your form into filters automatically, I don’t have those fields in my form so I will leave those.
- In the Show and Hide columns option, you can select which columns you want to see on the report.
- Press Save when you are done and then click the entries button in the top bar to see the data.
- You can also share it and send the report for approval too if you want.
Form analytics
The built-in form analytics is a quick view of the number of people who viewed and completed your form including a conversion rate which is the difference between the two. It is also broken down by date and time and the geographical region.
Integrated with Zoho Analytics
Zoho Analytics is a powerful reporting platform. If you would like to do more complex reporting of your forms and even mash it up with other data, then it is your best tool.
To integrate to it, do the following:
- Make sure you are pushing the data to a CRM system like Zoho CRM first.
- Then go into Zoho Analytics (analytics.zoho.com), make sure you have an account. If you have Zoho One, ask your Zoho One administrator to give you access.
- Then go to your workspace in analytics and import the data from the CRM and you should get the form entries.
- If you used a custom module in the CRM to hold the form data, you may need to sync the new module and all the fields because it might not get picked up.
Exporting to a spreadsheet
If you have integrated your form to a spreadsheet-like Zoho Sheets or Google Sheets, then the entries will arrive there automatically. However, if you want to export it as a file and open it up in Microsoft Excel, for example, you need to go to the “All Entries” option and then download it from the export button on the top right.
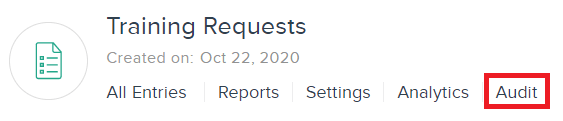
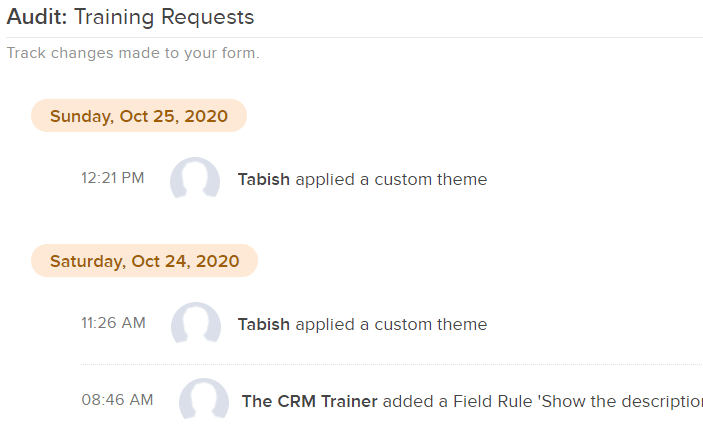
Auditing – who’s been modifying your form?
If you have multiple users who can access your form, they may change the form without informing you. You can track the changes made to the form using the Audit button. This takes you to a log of changes
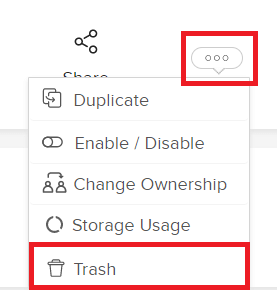
How do I delete a form?
If you make a mistake, you can easily delete a form by selecting the three dots/ellipses next to your form and selecting the trash.
Advanced settings
Changing your form URL to your own website domain
You may not want people to know your using Zoho forms. If clicking a link to the form redirects away from your website or your domain, then they will know that the form is not on your website. If you are embedding the form in your website already, then this isn’t an issue, however, if you are sharing the link, then you want to keep it consistent with your own website.
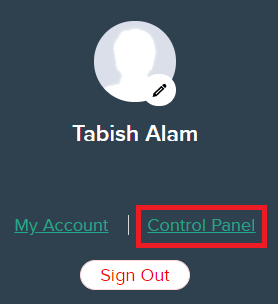
- Go to the profile picture in the top right-hand corner of Zoho Forms. Select the control panel button then choose the custom domain option

- Here you will add your domain that you want to use, but before you can do that, you need to set up a CNAME in your domain.
- Go to your domain host and find the settings to add your domain. This will be in the DNS settings.
- Add the CNAME record forms.cs.zohohost.com
- Ask your IT team for help if you need help or you don’t have access to your domain settings.
- Once the CNAME record is added, it can take up to 48 hours to take effect.
- Go back to the custom domain setting in your control panel and add your domain.
- Once you have done that, it will be marked as pending. Zoho will let you know by email between 3-5 days once they have processed it and you can then use it in the domain settings in any form.
Can I send emails from another email address rather than Zoho Forms?
Yes, you can, here’s how:
- Go to the control panel in your profile on the right.
- Select the DKIM Configuration
- Enter the domain you want to use in the box. Then press Add Domain.
- You will notice it provides you a hostname and value. This needs to be added to your DNS settings.
- If you need assistance, ask your IT team as you may not have access to your domain settings.
- You will need to add a text value to your DNS settings. Add the hostname and the value to your DNS.
- Once you have done this, return to Zoho Forms and mouse over the domain in the DKIM settings and a green verify button pops up.
- Click verify, if you have added the DKIM correctly this will show as verified. If it doesn’t, you may have made a mistake in the DNS settings, ask you IT team for assistance. You can also contact the Zoho Support help desk directly for some help if you want.
How can I remove the “Powered by Zoho” logo on my form?
The powered by Zoho Forms logo will be removed when you go onto a paid subscription.
Wrapping up
There is a lot of functionality in Zoho Forms. This article shows you the most important parts of Zoho Forms, however, there are lots more features which I haven’t covered. If you have any questions about working with Zoho Forms, then drop me a message and I’ll try to make a short video to help if I can.