No time for the whole Zoho CRM manual? Use this guide to get around quickly!
- Definitions
Lead – Unqualified prospects, AKA presales pipeline.
Accounts – Companies and Organisations, the parent record in your CRM in a B2B business model.
Contact – A contact of an Account, or the parent record in a B2C business model.
Deals – A sales opportunity AKA sales pipeline.
Activity – An action for the user or has happened with the customer or prospect.
Tasks – An internal activity, also known as a to-do which can be assigned to another user.
Events / Meeting – External activity, which can include multiple people.
Calls – A phone call that has happened or is planned and recorded in the CRM.
Quotes – A quote to the Prospect of goods and services you are offering.
Sales Order – A contract for the sale of goods and services.
Invoice – A request for payment or a record for internal reference.
Zoho Finance Suite – Zoho Books integration, this replaces the standard Quotes, Sales Orders and Invoices.
Dashboards – Provides insight into your business with graphs and KPIs
Reports – Turns data into actionable information and allows export into excel.
- Logging In
Log in to either crm.zoho.com or crm.zoho.eu. – 2 versions for local data protection rules. Related to storage of data in either EU servers or rest of world.
Enter your Username or Mobile number (if you have linked it with your Zoho Account).
Press Next. Enter your password and Sign In.
After signing in , if you have multi-factor authentication on, follow the instructions to access the system.
- Searching
Before creating a record, check it already exists. Use the global CRM search in the top right.

Enter unique values and names, e.g. surnames.
The autocomplete will show matching records.
Either select a record or press [Enter].
If you use partial search terms then you may get too many results.
Rather than always searching again use the recent records in the bottom right.
- Managing Prospect or Customer Lists (List Views)
Create a view
Click the list view on any module.
Select Create View from the list.
Specify the criteria by selecting the first box and picking the operator: is, isn’t, contains, is empty etc. Then enter the value for the filter in the grey box to the right.

To add multiple criteria press the plus button to the right.
Enter additional criteria. Choose if it is an “and/or” choice.
Use a “,” in the criteria value field. This acts as an “or” criteria too.

Drag fields you want from the Available column in the Choose Columns section to the Selected column.
Device who you want to share the list with and then click Save.
Cloning a view
Select a view and mouse over it so the word “edit” shows up, Click Edit.
Click Clone at the bottom.
Rename the view.
Make your changes and then Save.
- Filtering inside a View
Select a view.
If you cant see the filters expand the panel.
Tick the fields you want to filter by and then customise the criteria. Click Apply (it may be out of sight, so scroll down to find it)
Save the filter if you want to keep it. If you don’t want it, click Clear.
- Emailing from the CRM
First connect your email account to CRM. Go to Setup > Channels > Emails.
To send emails click the Send Mail button on the top bar. To send an email from the Quote, Sales Order and Invoice records by selecting the ellipses (three dots …) and pressing Send Mail.
- The Correct Way to Create Records
If you can’t find a record in the CRM, create a Lead.
Qualify and convert a Lead into an Account, Contact and Deal.
If you need to create an Account, starting from the Lead is the easiest way.
The Correct Sequence
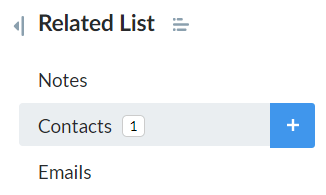
Select an Account and press the + button on the left of the Contacts label under Related List.
Create a Deal from a Contact by pressing the + button next to Deals in the Related List.
Create a Quote from the Deal by pressing the + button next to Quotes in the Related List.
Create a Sales Order from a Quote by pressing the Convert button at the top of the page.
Create an Invoice from a Sales Order by pressing the Convert button at the top of the page.
Creating a Lead
Select the Lead module and press the + button in the top bar.
Complete the Name, Company, Email or Phone and any other details. Click the blue Save button in the top right.
Mandatory fields are marked with a red line on the left of the field.
Creating an Account
Select the Account module and press the + button in the top bar.
Complete the Company and any other details. Click the blue Save button in the top right.
Creating a Contact
Select an Account and press the + button on the left of the Contacts label under Related List.
In a B2C business model (where you don’t have an Account), select the Contact module and press the + button in the top bar.
Complete the Name, Email or Phone and any other details. Click the blue Save button in the top right.
Creating a Deal
Either create a Deal by converting a Lead or manually.
Manual
Select a Contact and press the + button on the left of the Deals label under Related List.
Fill in the Stage and Closing Date (mandatory) and Amount if you can.
Add any additional information if required.
- Converting a Lead into an Account, Contact and Deal
Select the Lead to be converted and press Convert in the top right.
Fill in the deal information and change the owner if required.
Select Convert.
- Editing Existing Records
Select the record from a search or a list view and then press the Edit button in the top right.
Update any fields and then press Save.
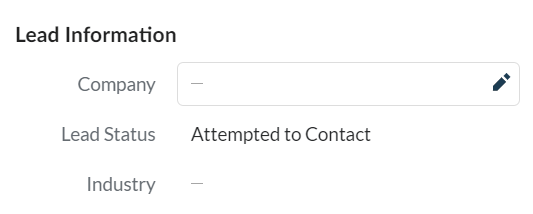
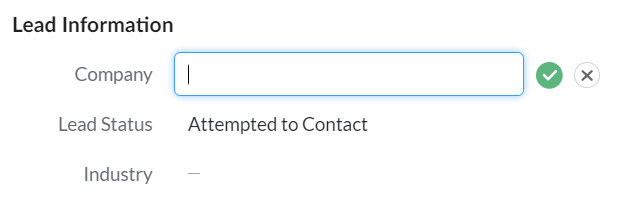
To update fields without going into edit view, hover over the field and click the pen icon to edit the field.
- Cloning Records
Choose any record and click the ellipses in the top right to find and select the Clone option.
Make your changes then click Save.
- Bonus Tips for Professional Edition and Above
Creating a Quote
Select a Deal and press the + button on the left of the Quotes label under Related List.
Update the subject and other fields.
Add the products to the Product Details section. Update the List Price, Quantity and Tax.
If you have used line item taxes, don’t add tax to the Total otherwise you will be double taxing.
Press Save.
Sending a Quote
Choose Send Mail by clicking the ellipses in the top right.
Select the Quote template and press Next.
Select the email template to use in the “Select Template” at the top of the email.
Edit the content of the email.
Check the contact and then send the email.
Generating a Sales Order and Invoice
Select a Quote and convert it to a Sales Order using the green Convert button in the top right.
Edit the Sales Order and then press Save.
On the Sales Order press the green Convert button in the top right and select Invoice.
To send the Invoice press Save and then select Send Mail by clicking the ellipses in the top right.
Select the Invoice template and press Next.
Select the email template to use in the “Select Template” at the top of the email.
Edit the content of the email.
Check the contact and then send the email.