There are lots of ways you can connect your website to your Zoho CRM. I’ll go through 4 of the most common ways to do it but there are others.
Let’s get started with the first one.
Zoho CRM Webforms
Use it if:
- You want a simple web form
- You’re not very technical
Don’t use it if:
- You have a complex form with lots of fields
- You wish to run logic on the form so fields show and hide based on what is entered
- You want lots of additional functionality
If you have Zoho CRM Professional or Enterprise then you already have the web form feature. You can create a webform based on a module in the CRM and then every time someone fills in that form on your website, a new record is created. This is how you make it:
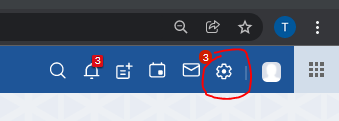
- Go to the settings in the top right of the page in Zoho CRM
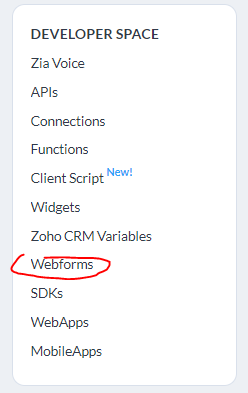
- Then select Webforms in the developer space:
- That will take you to a page where you can select the module that runs the webform.
- VERY IMPORTANT! Most people will be using the Leads module. You could also set up a custom module in the CRM to receive the webform entries. We’ll use the Leads module. Ignore the other tabs at the top such as A/B testing, auto-response, and unsubscribes, they’re not relevant for this article.
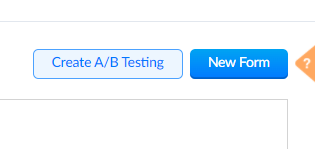
- Click New Form on the page.
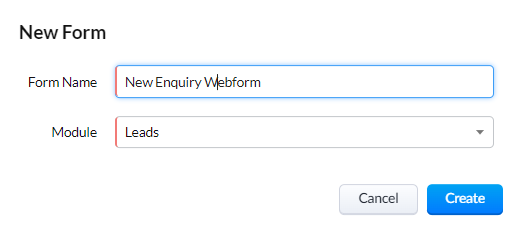
- Give your form a name and select the module.
- This gives you a blank page to start building the form:
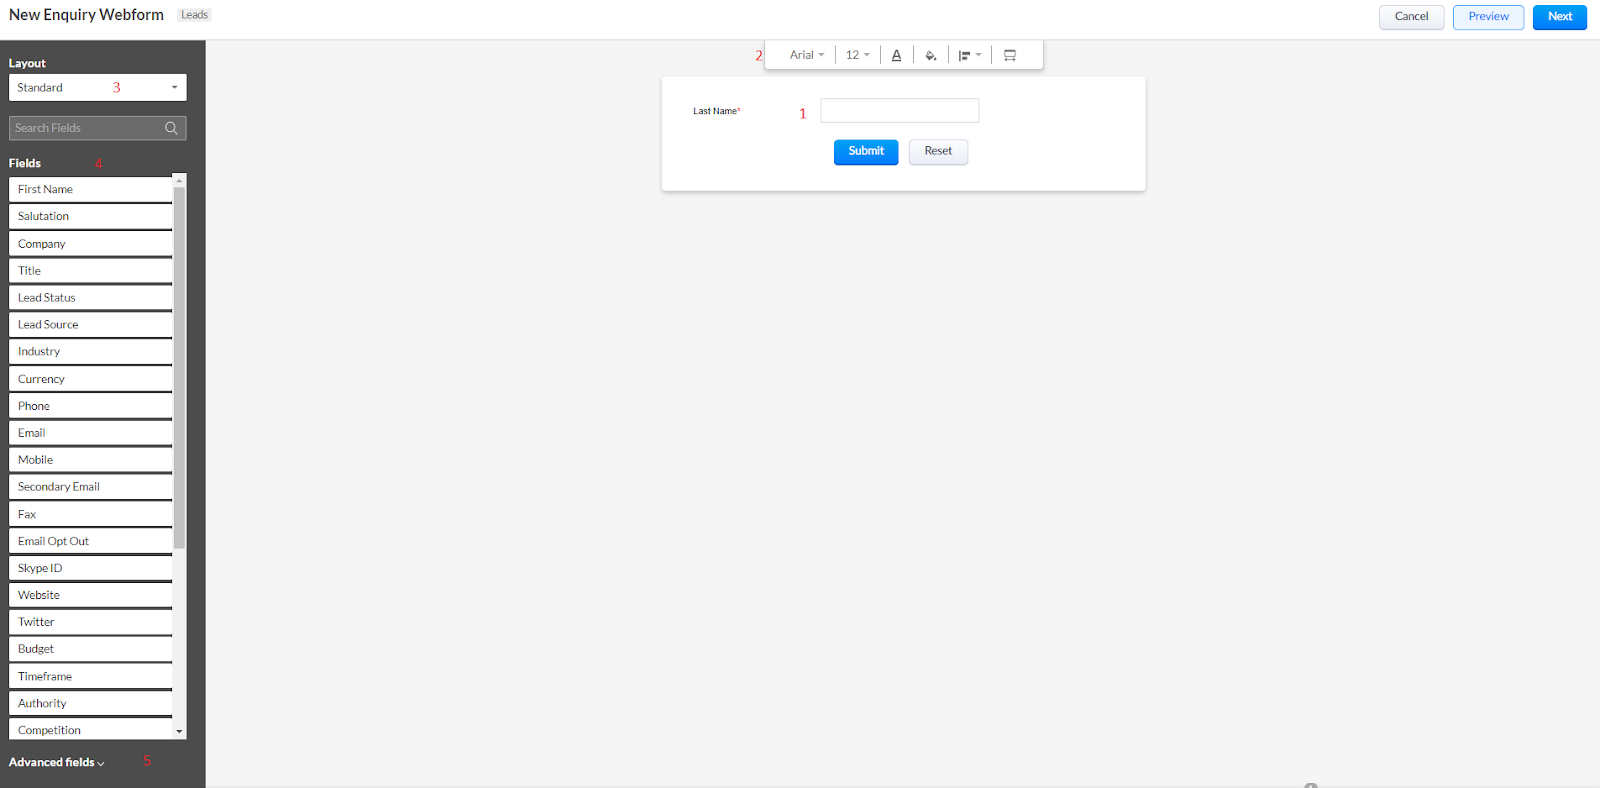
- Let’s have a quick look around
- The main section (1) is where you’ll be adding the fields that you want to capture for your webform.
- You can format these fields using the top bar (2).
- You can also select which module layout (3) you want to get the fields from, because different layouts can have different fields. Of course if you don’t have custom layouts then just use the standard layout. I suggest using layout rules where possible, to learn how to do that check out my CRM build course.
- Over on the left are the actual fields you have available to add to the form. Note that you cannot add fields from this page. So if you haven’t already got a field in the module, you need to add it first then come back to this page.
- Below this section is the advanced fields. This allows you to add additional things to your form. Such as the anti-spam feature, there are 2 options available. The standard Captcha and the Google reCaptcha. Use the Google one, it’s far better. You’ll need to create an account to use this. Use either v2 or v3.
- You can also allow file uploads from this form as well but be careful about malicious files.
- Drag in a privacy policy section if you want, so people have to agree to your privacy terms to submit the form.
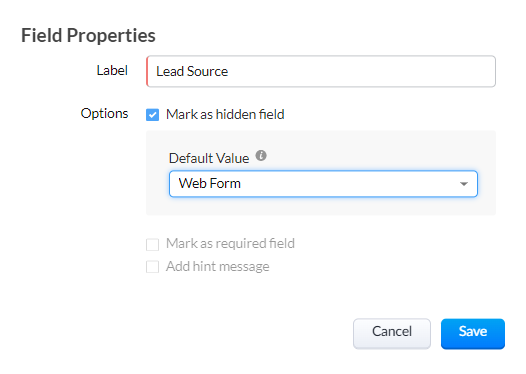
- Let’s add the fields to the form, this example is a new enquiry form, so the form is simply to capture their contact details and their requirements. It’s also a good idea to use a hidden field for the lead source like this:
- Because this list of fields already exist in your CRM, when someone fills the form in, the data will automatically go to those fields. In the other methods below for connecting your website to your CRM, you need to point the fields of the form to the right fields in the CRM.
- Make sure you change the field label in the field properties as the field name in the CRM may not be what you want your web visitors to see. For example you can use the description field and rename it on the form to “Enquiry details”.
- Let’s go with something simple:
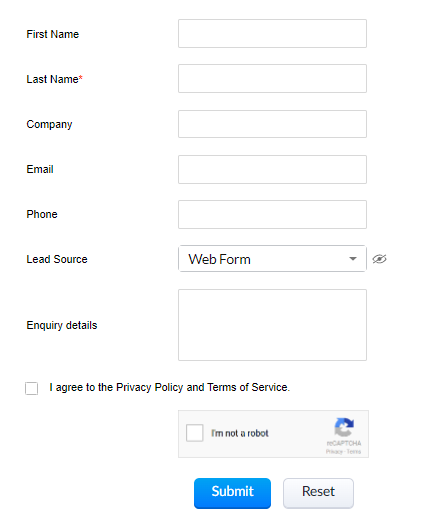
- Once you have added all your fields, then you can press preview to see what it will look like. Don’t worry about the design, if you have a web designer for your website they can improve the styling. I’ll show you what you need to give them so they can style it and add it to your website.
- Press Next and then enter the form location. If you haven’t decided where it’s going yet, just add your homepage in the first box. In the landing page box add the website that you want people to go to after they have filled in the form. If you don’t know, then put the same details as the first box.
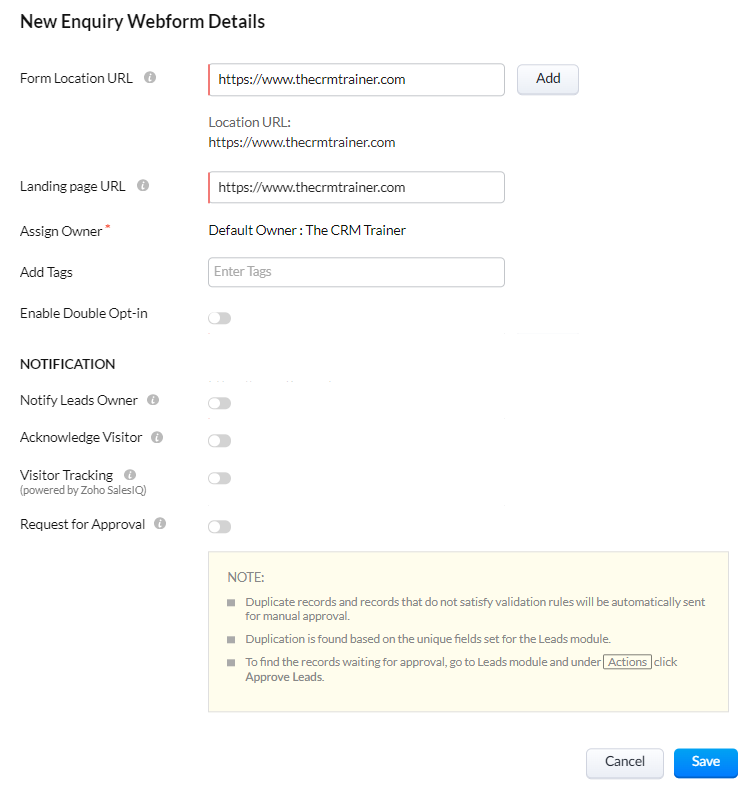
- In the next section, choose who is going to own the Lead record that is created when this form is submitted. Add a tag to the Lead record that is created if you want, this is for easier filtering later. If you want them to opt in to your marketing with a double opt in, then select the appropriate option.
- You can automate a message to the Lead owner telling them that they have a new Lead. You can also send an automatic email to the person filling in the form confirming that you have received the form entry and you can include next steps in this email.
- If you don’t want the Lead to be created for the CRM user to use but instead want to review it before giving it to your team, then select “Request For Approval”.
- If you have Zoho Sales IQ for tracking your website visitors, then click the “Visitor Tracking” option. This is a really good idea, check out my free short course on implementing Sales IQ for your business.
- Press Save. Next, we get to the page where we select how to put this on your website. There are 3 options:
| Format | Should you use it? |
|---|---|
| Source | The best option, it allows your web developer to control the styling and design of the form. If you did make a change to the fields in the form, then you will need to give your web developer the new source again. |
| Embed | Adds the form to the site but has less customisation opinions. Any picklist changes in your CRM will automatically update the form. |
| iframe | The easiest option, but your web designer might not like it, it also stops reCaptcha and url tracking. |
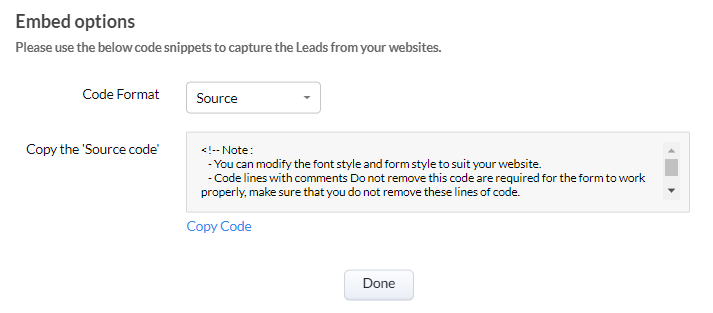
- Give your web designer the code that’s in the Source Code section and then you’re almost done. You need to test it, once they have added the form to the website, you can fill it in and see if a record turns up. If there is a problem, check the web developer hasn’t broken the source code by styling the wrong part. If the form still doesn’t work, then it might be an issue with your website, but just in case, drop an email to Zoho support to see if they can spot what’s gone wrong.
Zoho Forms
Use it if:
- You want a complex form
- You have a good idea of what you want to do before you begin
Don’t use it if:
- You want to avoid lots of options
Zoho Forms is a form building app from Zoho. It does have a lot of features which I have covered in my Zoho Forms Deep Dive.
In this article, we’ll do a simple form without using all the features listed in my Zoho Forms guide.
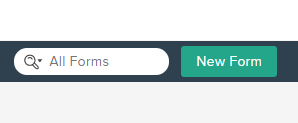
- Go to forms.zoho.com and press New Form in the top right:
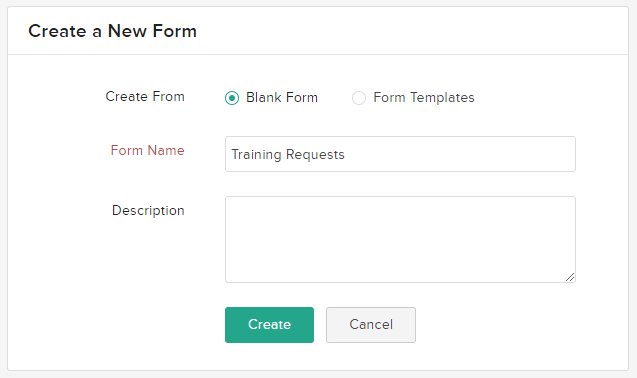
- Pick whether you want to start with a blank form or start with a template. Use the Blank Form option if you already know what you want to make. You can use the pre-built templates to give you some inspiration. I’m going to pick the blank form to show you the full process.
- Give your form a name and make it descriptive because you may create many similar forms, so don’t just write form 1, form 2 etc. If you need to give it a description, you can add some more information in the description box. This is useful when you work in a team, and you need to provide more information so your teammates can understand what the form is for. I’ll call my form “Training Requests” and press the create button to begin.
- Now you get to the Form Builder page. Change the title of the form and choose where this title will be positioned. Make sure when you’re building your form that you save regularly.
- Add all the fields you need by dragging and dropping the field types onto the page.
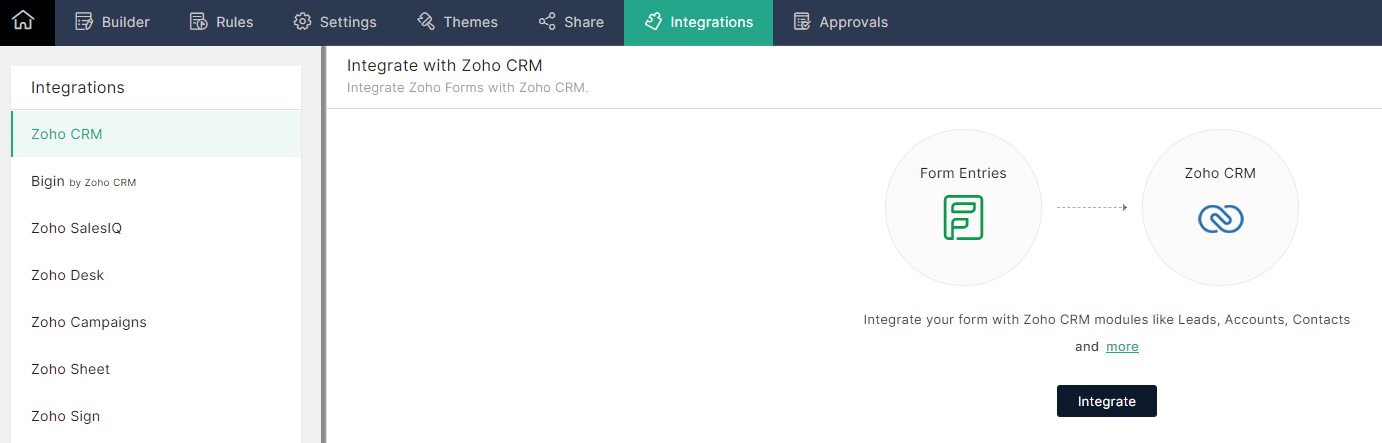
- We now need to integrate your form with the CRM, I’ll show you how easy it is. First press “Integrations” at the top. Then select Zoho CRM. You then need to press Integrate. You may get a page requesting you to sign in and authorise the integration. Press Accept if you get that.
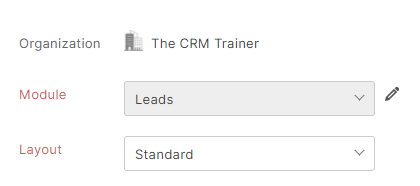
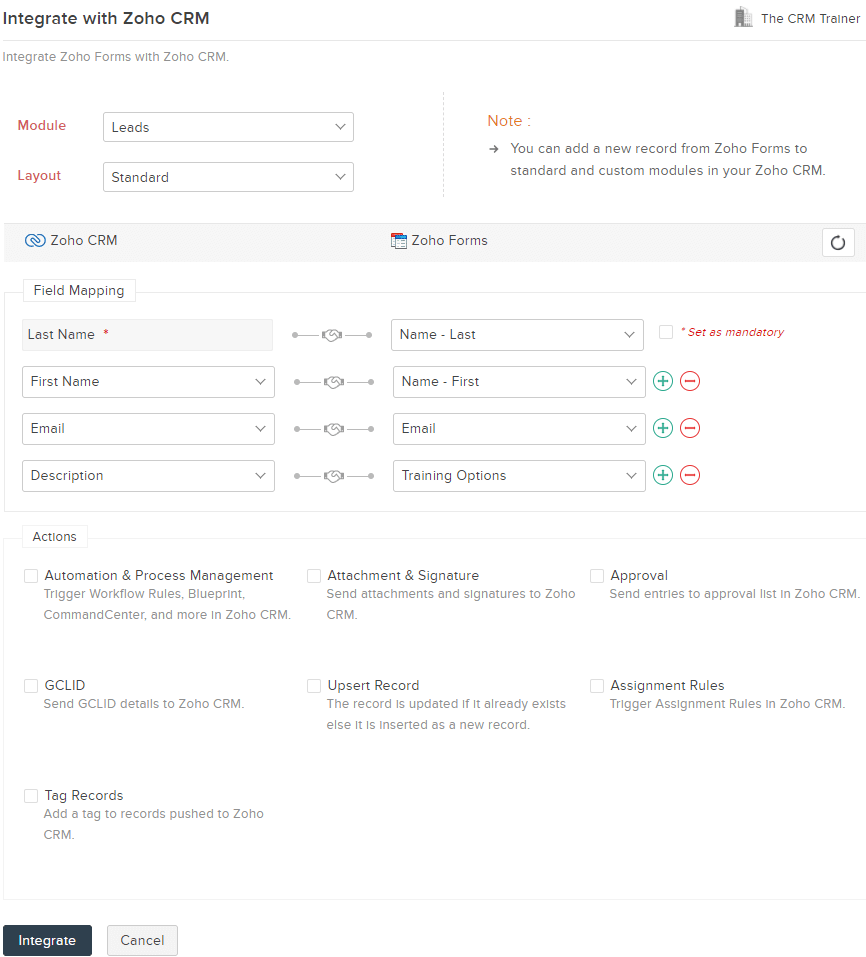
- Then select the module you wish to integrate into, I’ve picked the Leads module. Select the Layout, I generally don’t use Layouts in the CRM, I prefer using Layout rules so the majority of my systems only have one option here.
- Then select the fields that need to be mapped between the Zoho CRM and Zoho Forms. Select the field on the left from the CRM side and match it to where you would like the values to come from in the form on the right.
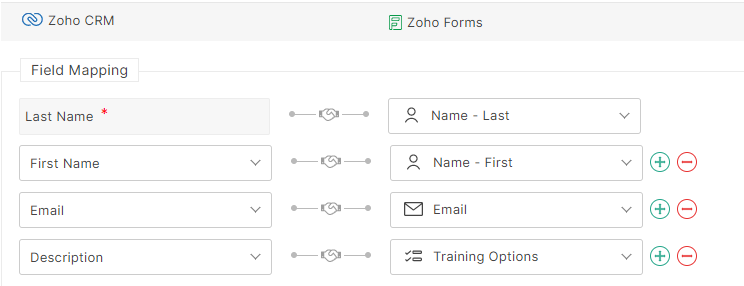
- Press the add (+) button to add as many fields as you need to. Once you are happy, make sure you tick a few of the boxes underneath.
- In the Actions section, select the Automation and Process Management check box so that any workflows in the CRM will trigger when a new record is added to it.
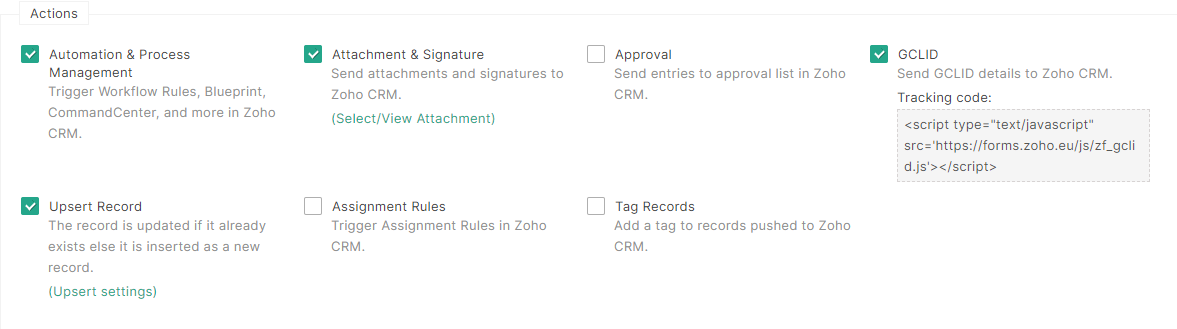
- Select Attachment and Signature to ensure these also get added to the CRM.
- Use the GCLID option so the Google Click ID for Adwords gets transferred across to Zoho CRM.
- Also, press the Upsert Record, if there is already a matching record in the CRM, then the integration will update the existing record with new details from the form (it uses the email address as the default to check if it already exists).
- If you were using Assignment Rules in the CRM, then make sure you also press this because otherwise the assignment rules engine won’t get triggered.
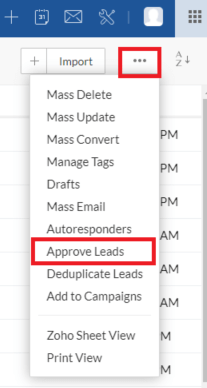
- You can also send the records into a special approval list rather than entering it into the main CRM list view. To access the Lead Approval list go to the CRM Lead module list view and select the ellipses on the right and choose the Approve Lead option.
- Once the records are in the CRM, you may want to track them with a field value. If you did not map a hidden field “Lead Source” with a default value, then you could use a tag. Check the box Tag Records to tag to the form record in the CRM.
- Once you have done this, press Integrate. Make sure you test it by filling in the form with a dummy entry and checking if the record is created in the CRM. If there are any mandatory fields in the CRM, this could block the integration, so either make sure these are filled in on the form or make them non-mandatory.
Webhooks and APIs – Feat. Zoho Flow
Use it if:
- You want complete control over the process
- You have good technical skills
- You have a preferred non-Zoho Form tool
Don’t use it if:
- You want all the standard features from Zoho Forms and Zoho CRM webforms
There are various ways of connecting your custom form to Zoho CRM. We are going to look at a direct integration and another method through Zoho Flow. Zoho Flow allows you to connect apps together, it is very similar to Zapier.
Using a third party form’s own integration to Zoho CRM
There are lots of non-Zoho form tools out there with direct integrations with Zoho CRM. I will pick a popular one for this example called jotform
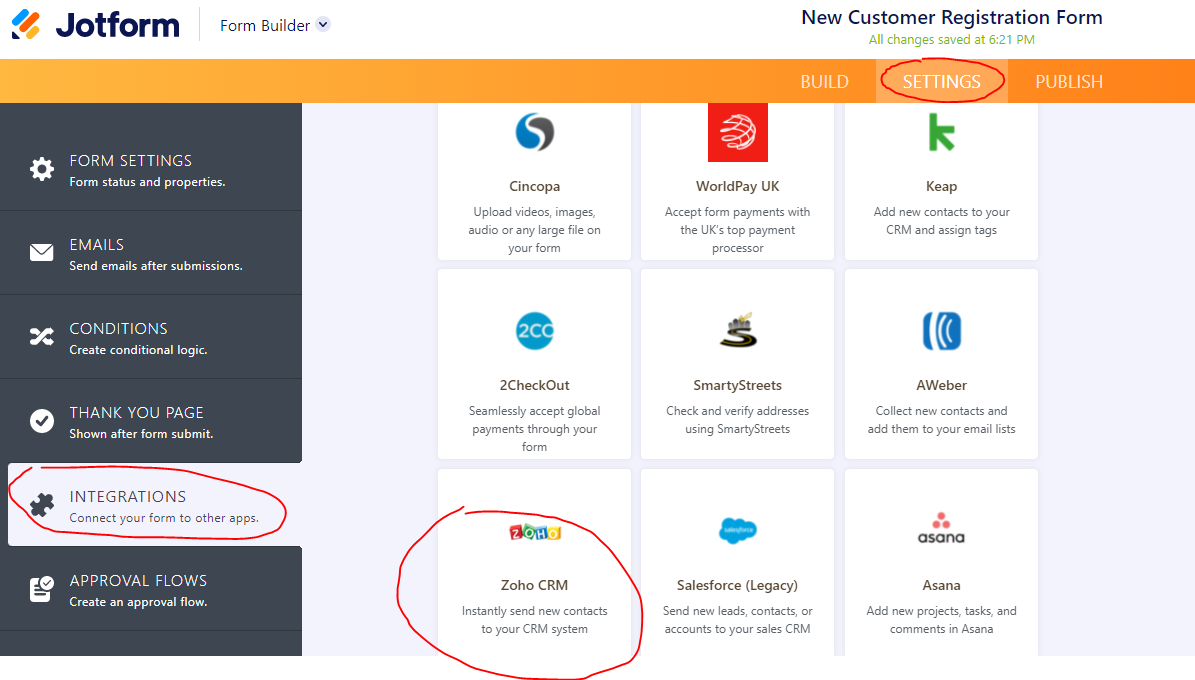
- We’ll pretend you already have a form you have already created in your form builder. In the case of jotform, we have created the form and then gone to the settings tab and selected Integrations on the right hand side.
- Search down the list for Zoho CRM.
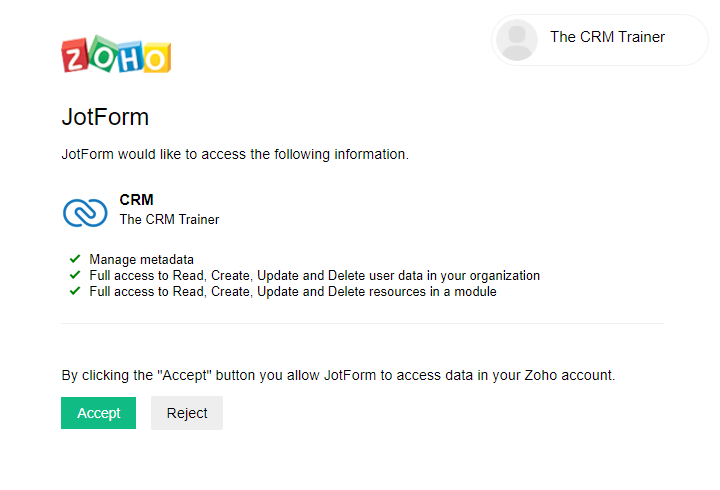
- Once you select the integration you will get a message to authenticate the login.
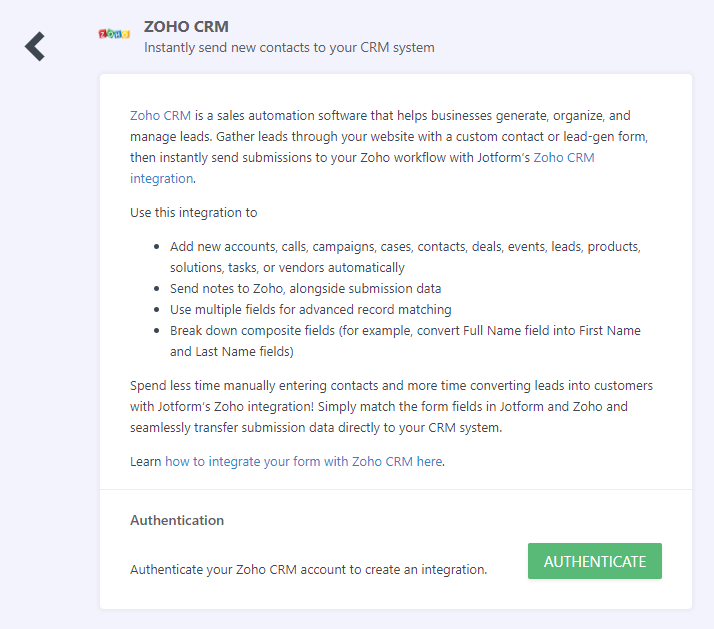
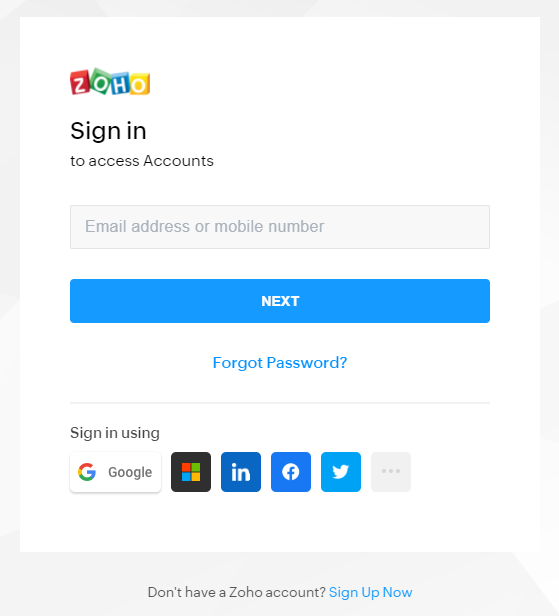
- Click Authenticate and then login to Zoho CRM with your details in the popup window.
- Then you need to press the Accept button so Jotform can push data into your Zoho CRM
- Once you have done that, you can pick the module that you want the form entries to go to. I will pick the leads module.

- Once selected, it will ask about the layout in the CRM, I will pick “Standard”. Then you will need to relate each form field to the Zoho CRM fields.
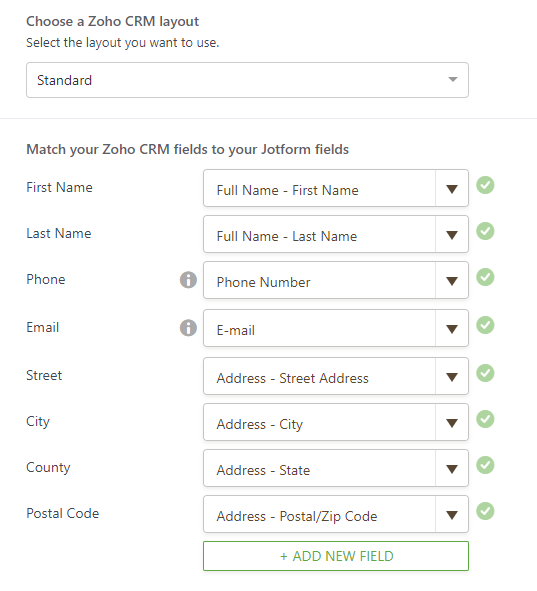
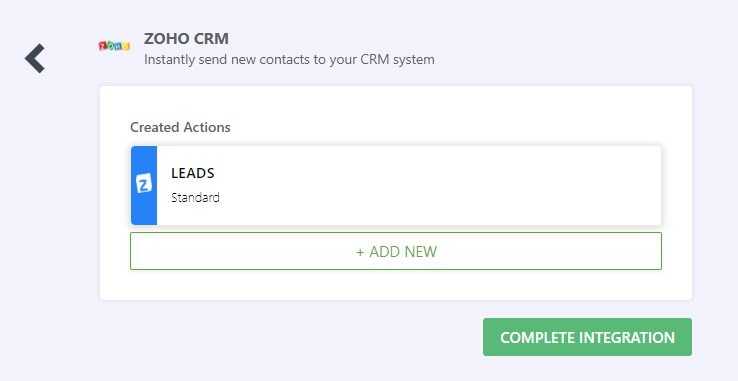
- Make sure you have selected all the fields in the form. You don’t want to lose data! Another important step that many form integrations will have is to trigger the Zoho CRM workflows. Make sure this is set to Yes.

- If you want to have duplicate matching and therefore only update existing records if it is already in the CRM rather than creating a new record. Set that feature if you don’t want duplicates.

- Then hit Save. After that, you will go back to the integrations page, select Complete Integration and then finish.
- Once this is integrated, test your form by putting in some details and seeing if it turns up in your Zoho CRM. I just tested this form and it’s created a record in the CRM immediately. Huzzah!
Using Zoho Flow App gallery to connect your form to the website
Let’s stick with Jotform to integrate another way. Your form may want to work this way rather than have it’s own pre-built integration. It might be in the Zoho flow list in the gallery.
- First thing to do is to go to Zoho Flow, sign up for the free trial if you don’t already have access to it. Once you have logged in, go to a page called My Flows. This allows us to start building flows really easily.
- Select Create Flow on the top right,
- Then give it a name and a description.

- Then press Create. You will then get this screen:
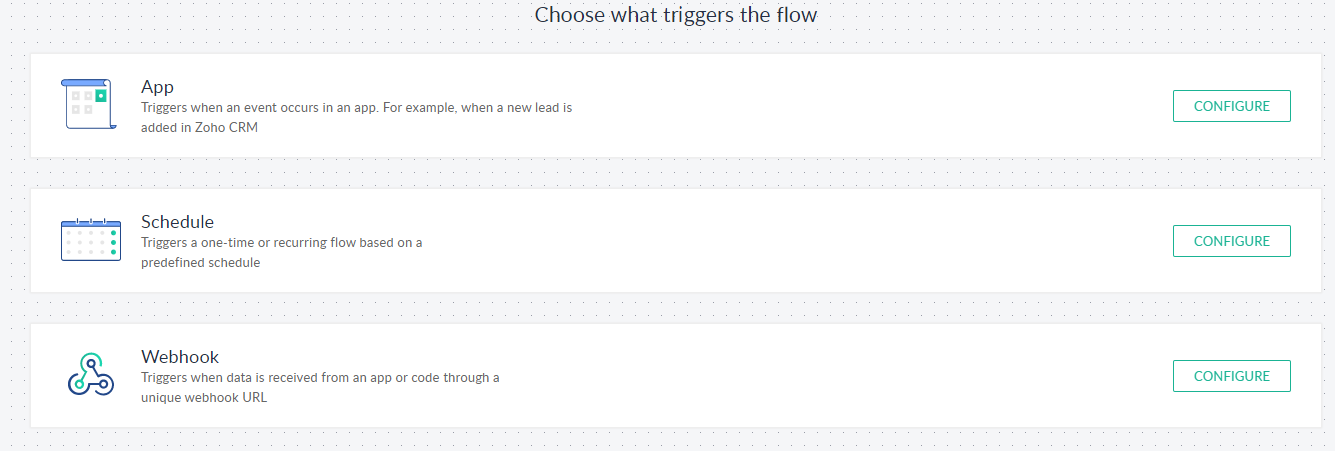
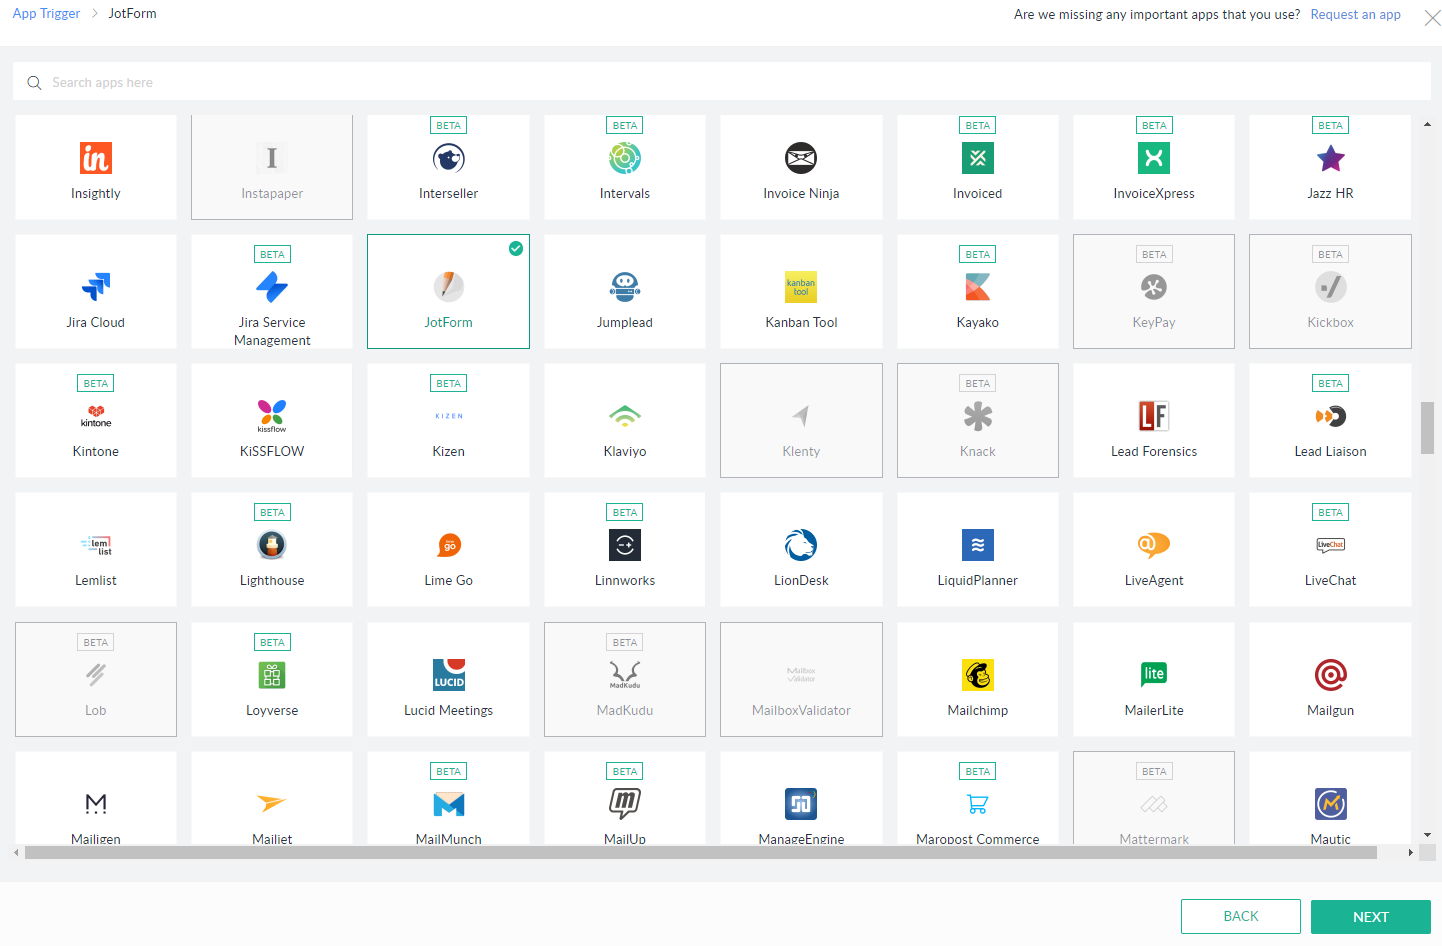
- This is our trigger. The obvious trigger is that a form is filled in so let’s press Configure next to the App option at the top and find our app from the list. Once you have found your app, select it and then press Next.
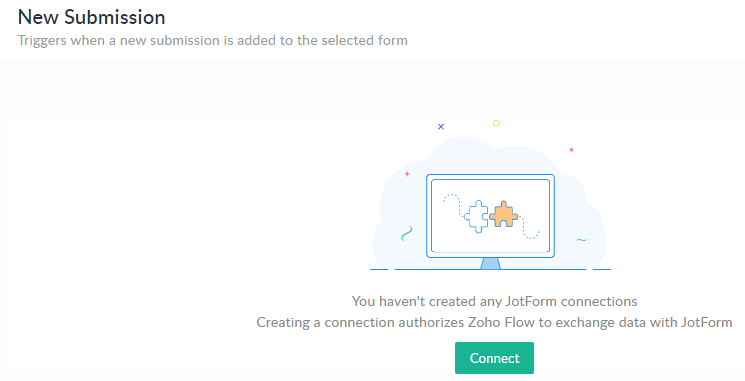
- Then you will get a page listing out the triggers. There’s not many triggers for a form, except when a form is filled in, so select New Submission and then press Next.
- You will then need to create a Connection with Jotform, so press Connect on the page that appears next.
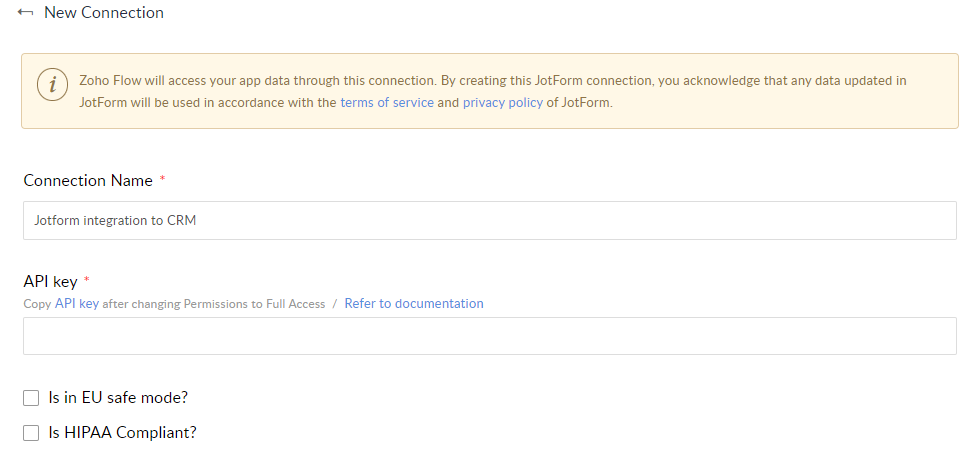
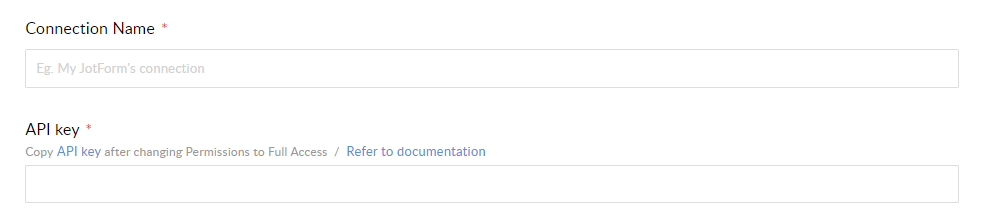
- Give your connection a name, something obvious like “Jotform integration to CRM”.
- Next we need an API key from Jotform. Different form apps will have different API Key generation methods. Go through the documentation for your form tool.
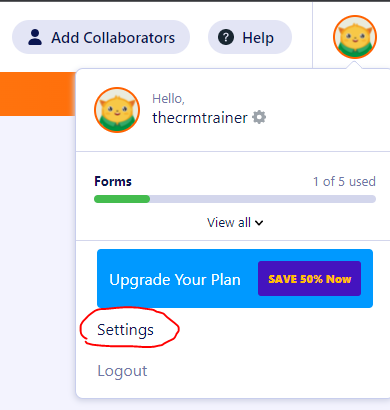
- Luckily the process is very easy for Jotform. Go to the setting in the top right of the page in your profile picture in Jotform.
- Then select API on the left. We then need to select Create New Key.
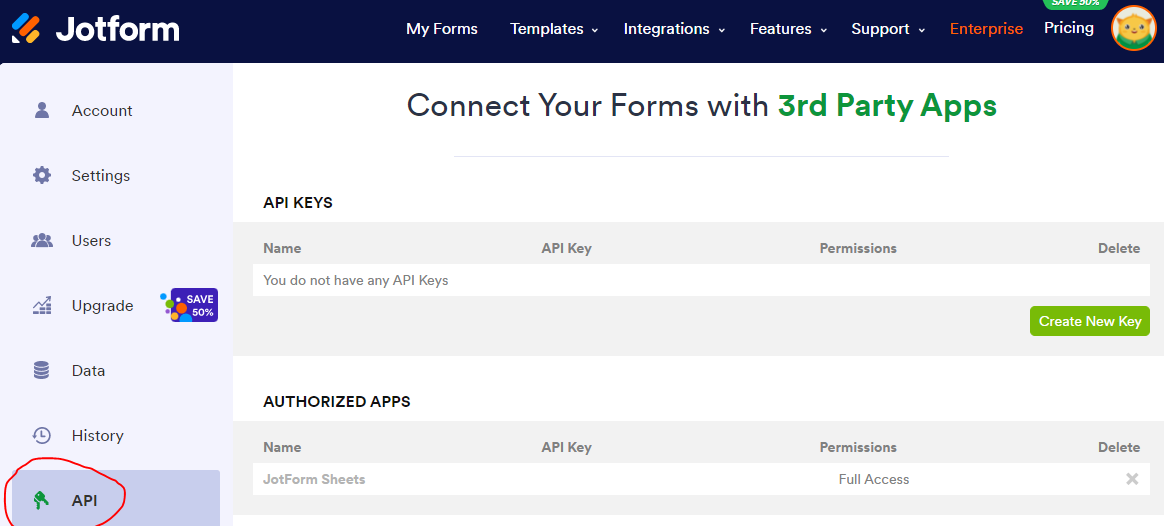
- A new key will be generated, give it a name, make it the same name as the connection you created in Zoho Flow. Set the permission to Full Access and then copy the key into the Zoho Flow connection.

- Once you have copied this to Zoho Flow. Press Authorize in the connection page in Zoho flow.
- If you get a message about your connection failing and needing to be switched to a different end-point, it could be the EU data sharing settings in Jotform preventing your connection. Go to settings in Jotforms and turn the Europe data centre off.
- Once it is authorised, you will get the connection confirmation. You can then set conditions to restrict when this is getting triggered. We want all form entries so we’ll leave it alone. Make sure you select your form on this page too.

- Select Done when you’re ready. After all that, we now have the trigger.

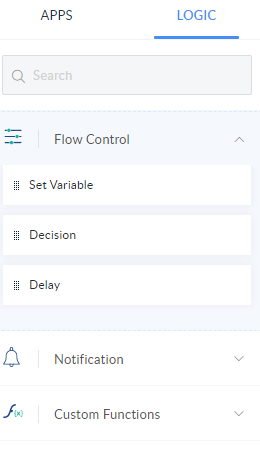
- We can add logic and conditions such as “if” statements which Zoho Flow calls Decisions. We don’t need that, we also don’t need custom coding here.
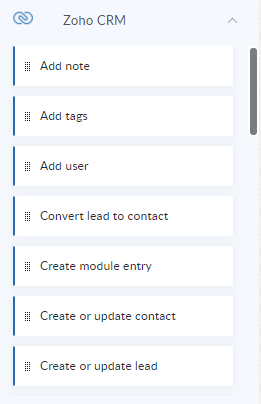
- We just want to push the form to Zoho CRM. So find it in the Apps list on the left. There is a big list of things we can do in Zoho CRM, but we just want to create a new Lead, or update an existing lead if it finds a matching record.
- Once we’ve dragged this and connected it to our first action, we then get a page asking for another connection. This time to our Zoho CRM. If you have one already, great, but if not, press the New button on the right of the options.

- Give your connection a name and then select execute for All Triggers and Actions. Then press Authorize.

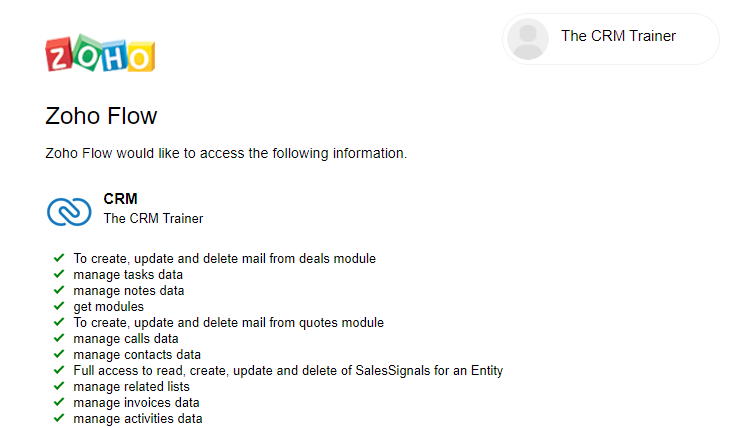
- You then get an authorisation page. Press Accept.
- Then you will get a new page which initially looks confusing, but it’s actually straight forward. You need to click on each of the Zoho CRM fields on the left side of the page and for each one you need to “map” a variable from the right. If that sounds confusing, actually doing it is really easy.
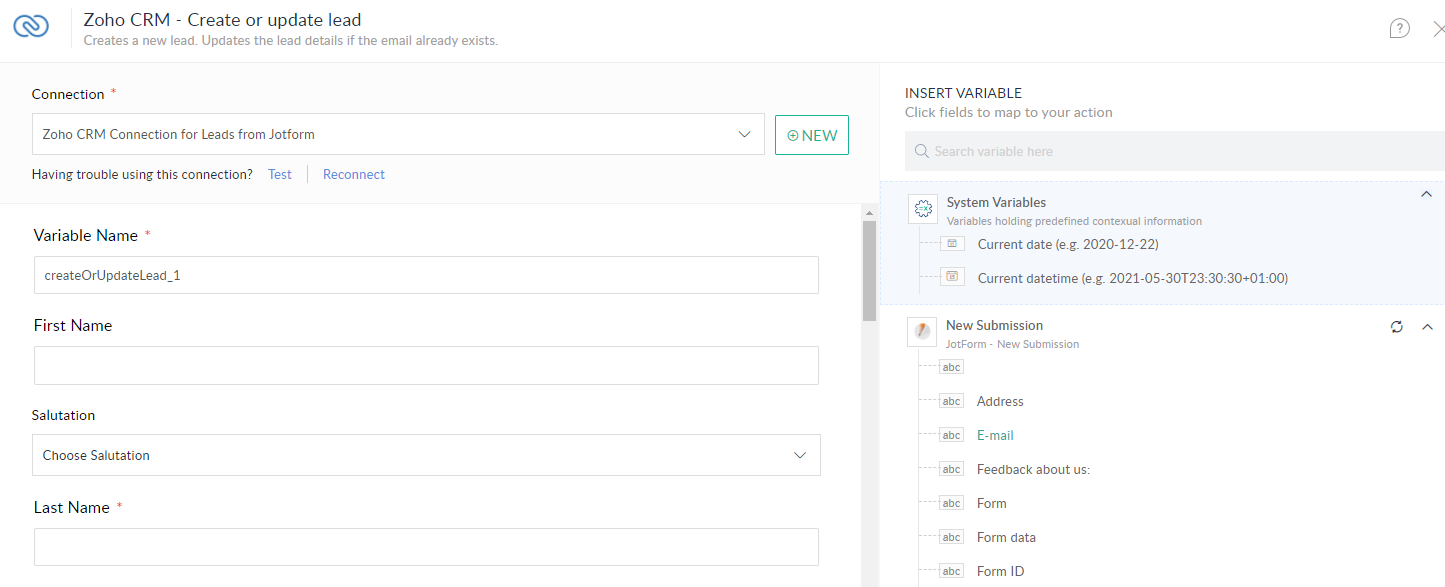
- Select the field in the Jotform section on the right, the fields might be hidden, so select the new submission section so it shows the fields. Then select each CRM field on the left and then pick the “Variable” on the right, this will automatically put the field mapping in.

- Once you have added all the variables from the right hand side to the fields on the left. Then you can press Done.
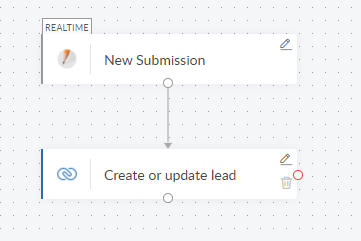
- Congratulations you have a Flow. You can get fancy and connect it to other things but we now need to make it active and test it.
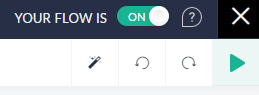
- Press the toggle in the top right to turn the Flow on. You can also test and debug it using the green arrow, but let’s push a form submission through.
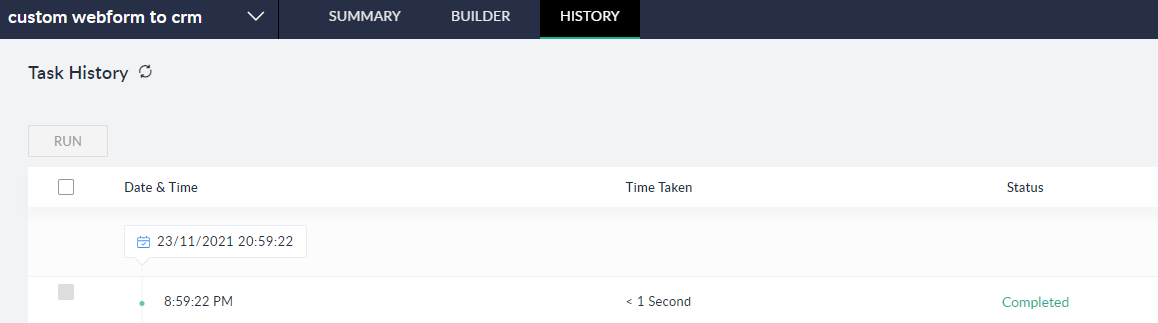
Once you have filled and submitted the form with a test entry, have a look at the history of the flow to see if it was successful. If it wasn’t, have a look at the error message.
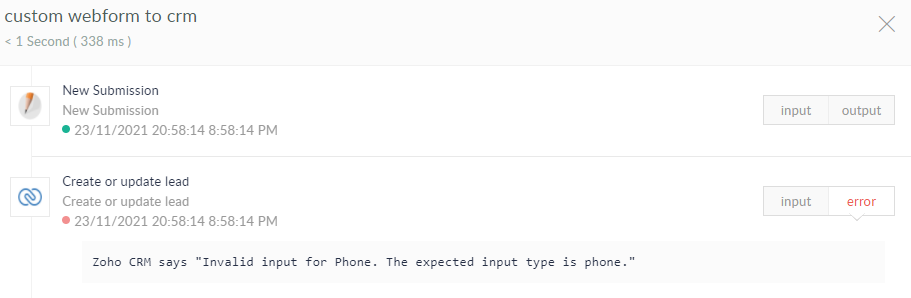
Once you have fixed it then resubmit the form to hopefully get a successful new record in the CRM.
Zoho Marketing Automation / Zoho Campaigns to Zoho CRM
A lot of marketing and sales strategies might want the form submission details to go into a marketing nurture campaign, rather than going to the CRM first. Only when they have received further information and perhaps opened and clicked some emails, you might decide to send the details to the CRM for sales people to pick up.
This is called a nurture journey! If you’d like to do that, then I’ll show you how!
To start with, you need to decide which Zoho Marketing app you want to use:
- Zoho Campaigns is a traditional email marketing tool and has the minimum functionality we need.
- Zoho Marketing Automation is more suited to building nurture funnels and journeys.
Guess which one we will be using? That’s right, Zoho Marketing Automation. This article isn’t about setting up and using Marketing Automation, let me know if you’d like a course on that.
So now that is out the way lets get onto building our form and CRM integration.
- First you need to sign up to either Marketing Automation or Zoho Campaigns. Once you have an account, you will need to set up a mailing list in Marketing Hub to take your data.
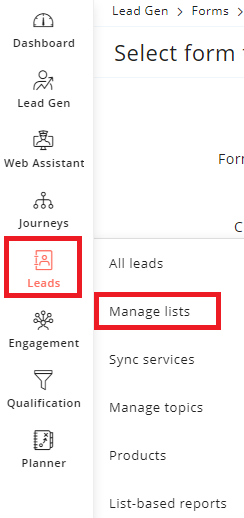
- Log into Marketing Automation and go to Leads on the left, then select “Manage Lists”.
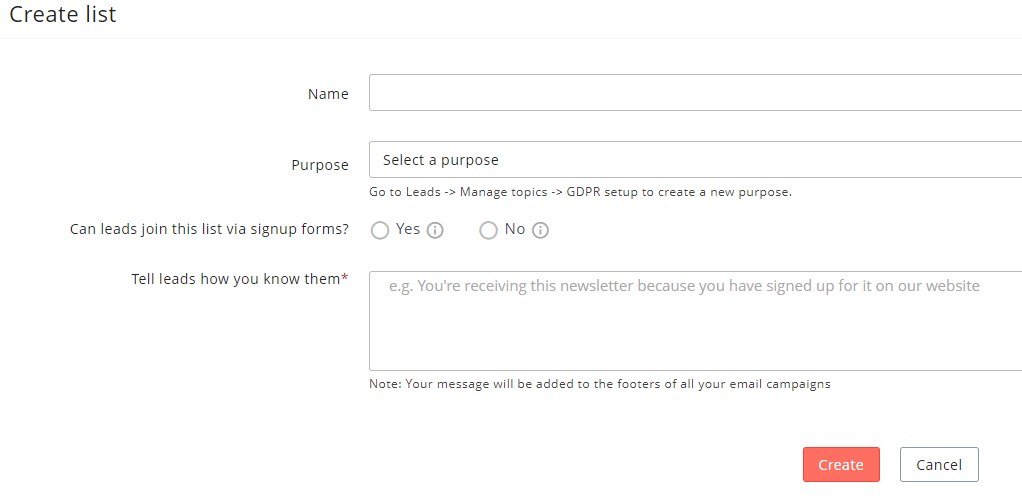
- Create the List and make sure you select Yes to the question Can leads join this list via signup forms?. Follow the instructions on the page to create your List, you may need to review your GDPR settings if you do not have an available purpose. That is a subject for another course.
- Once you have entered the details for your list, press Create.
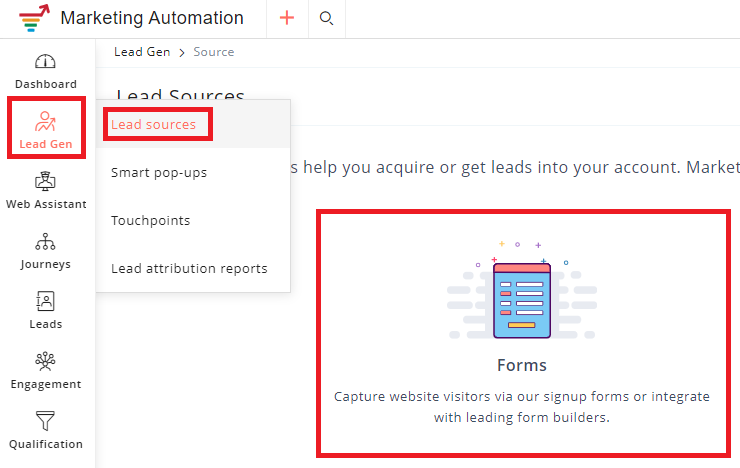
- Then we have to go to the Lead Gen tab and select Lead Sources. Then select Forms.
- Then press Create Signup Form.
- You will be presented with 3 options.
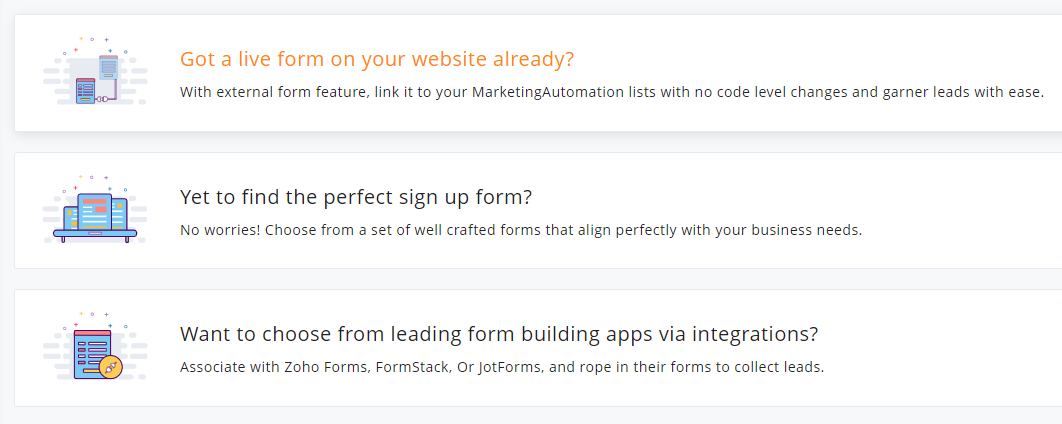
- The first option – ( Already got a live form? ) allows you to “scrape” the submissions of most forms on your website. This involves linking Marketing Automation with your website, we won’t choose this option because we are not going to go into setting this feature up, but you could if you want.
- The second option – ( Yet to find the perfect sign up form? ) is what we will pick as it allows us to build a form.
- The third option – (Choose from form building apps) is also another way of doing it. But we’ve already shown you how to use the built in integrations earlier in this article, this is similar to those methods so we won’t use this, but you can if you want to.
- So select the 2nd option if you are following along and then press Create Now.
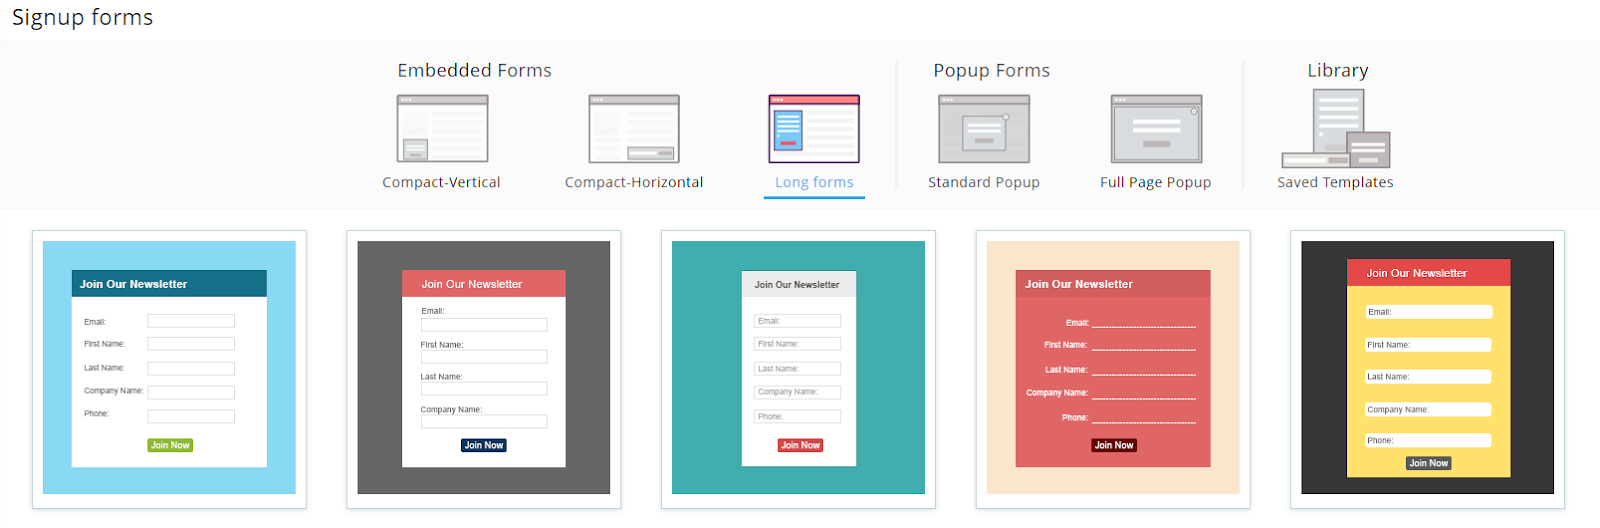
- You get some form templates to choose from. Pick one, I’ll pick one from the Long Forms section.
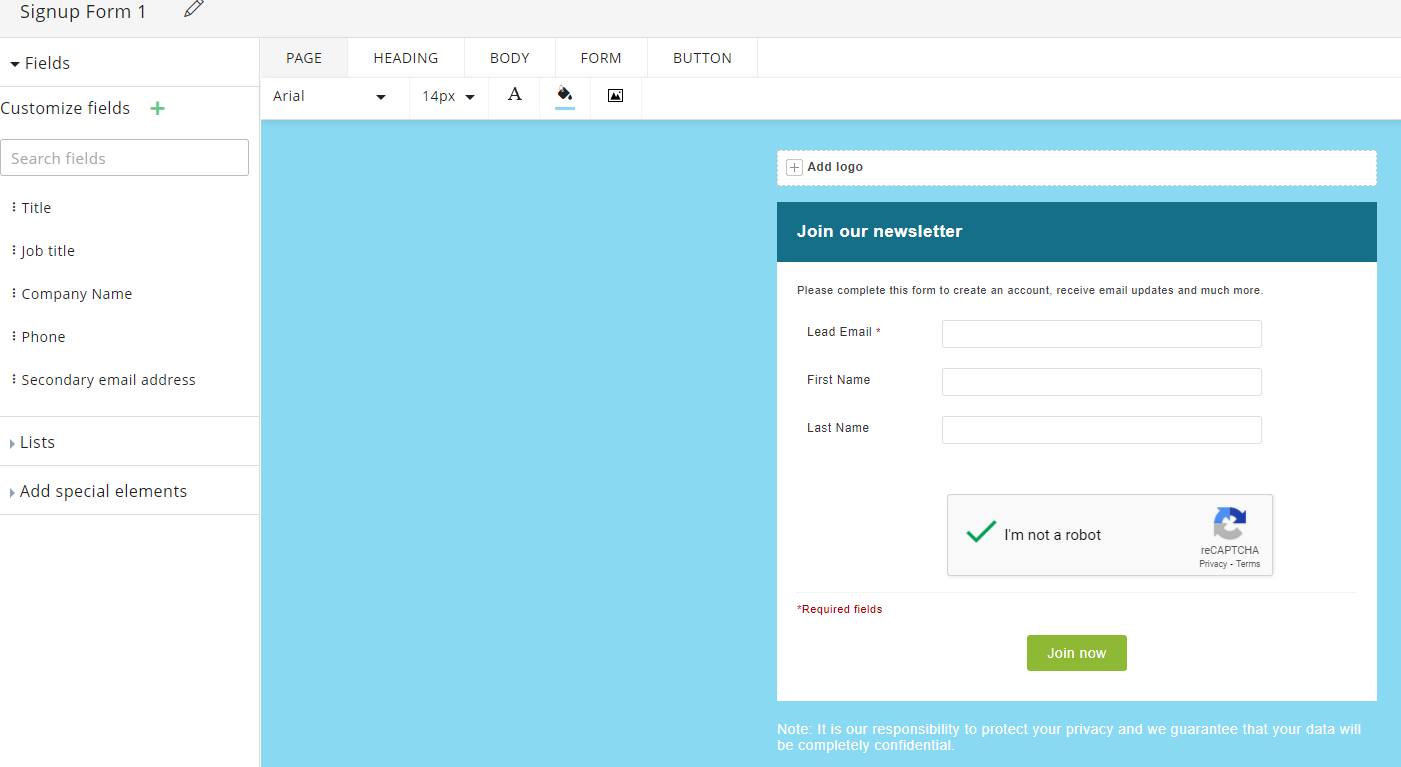
- Edit the form and add custom fields using the green + button on the left.
- Once you are happy with the form, give it a name in the top left corner and select the Lists on the left hand side to assign it to a mailing list. I won’t go into all the details here, that’s for a Marketing Automation course in future.
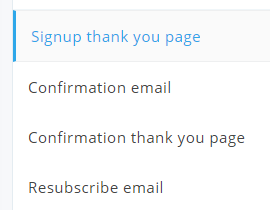
- Press Save and Proceed in the top right when you’re done. Then you will get to set up a Thank You page after the form is submitted as well as confirmation emails. Set these up the way you want.
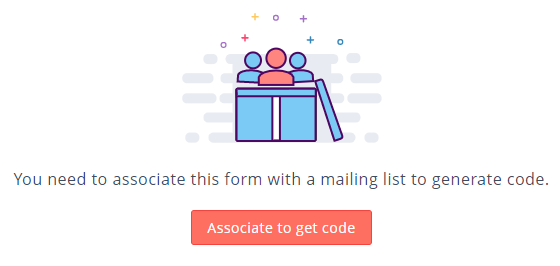
- When you are ready, press Save and Get Code. If you haven’t linked the form to a mailing list already, make sure you do it on the next page.
- There are lots of ways to put this form on your website. Pick the one you need or what your web team tells you to choose.
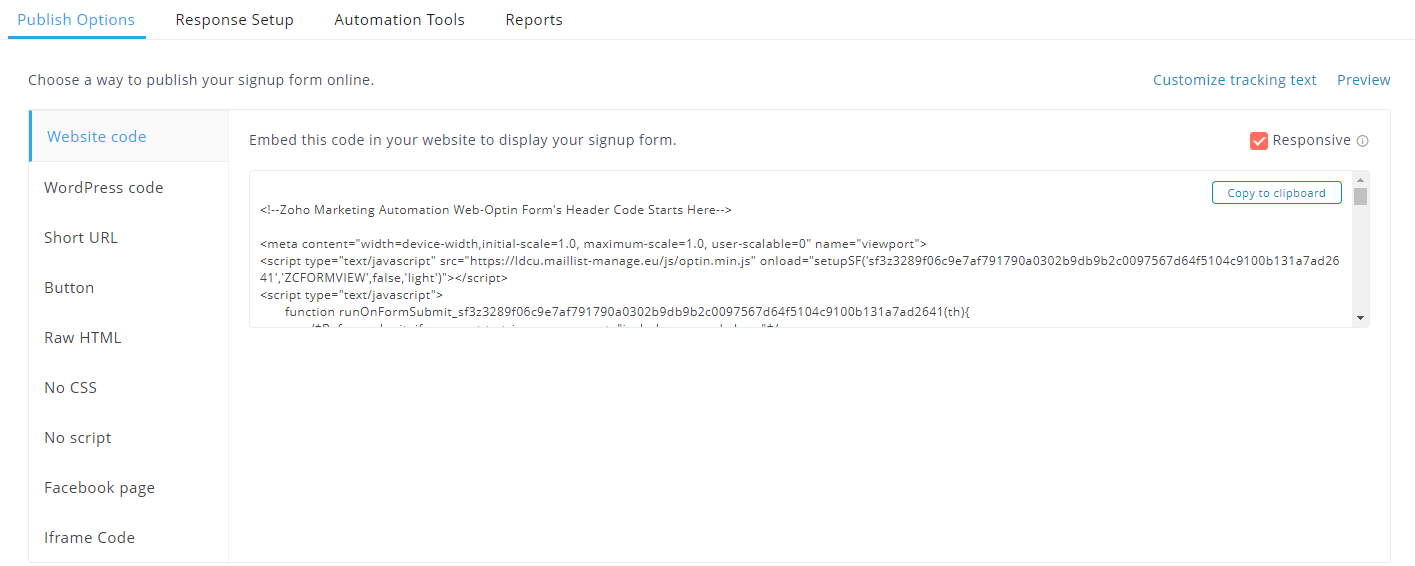
- Once you have done that, you can also have a look at the Automation Tools tab. It allows you to push the data to the CRM or to a journey. We will be creating a simple journey but not from this page.
- Feeling exhausted? We’re getting to the fun bit so hopefully you’re still with me. Ok, lets make a journey so we can do some nurturing and then send the details to the CRM.
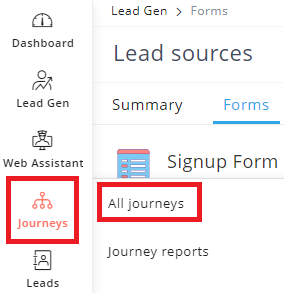
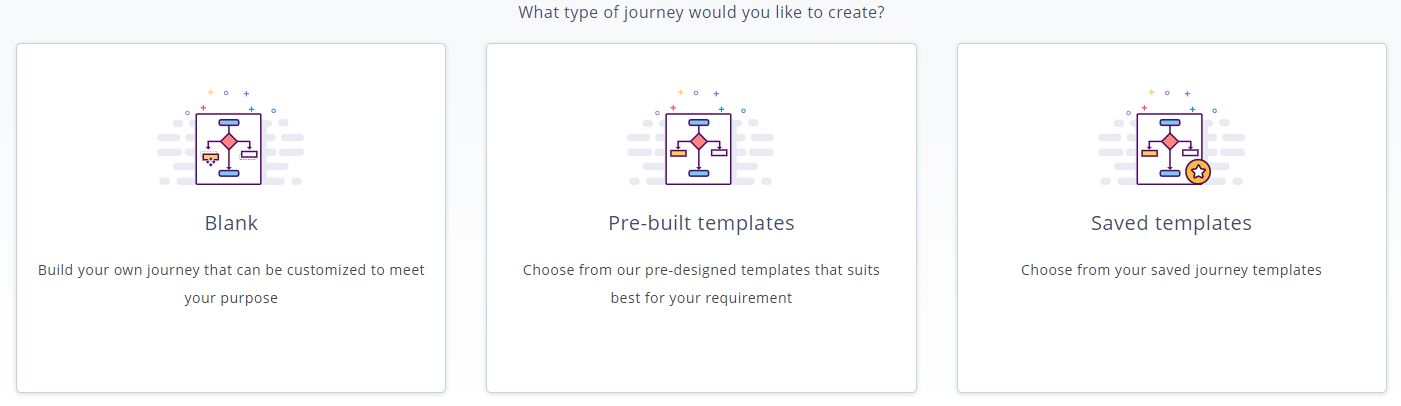
- Select All Journeys from the Journey tab. You can use a Journey template to start with if you’d like to see what you can do. But I’m going to use the blank option.
- Give your Journey a name. Then you have this page.
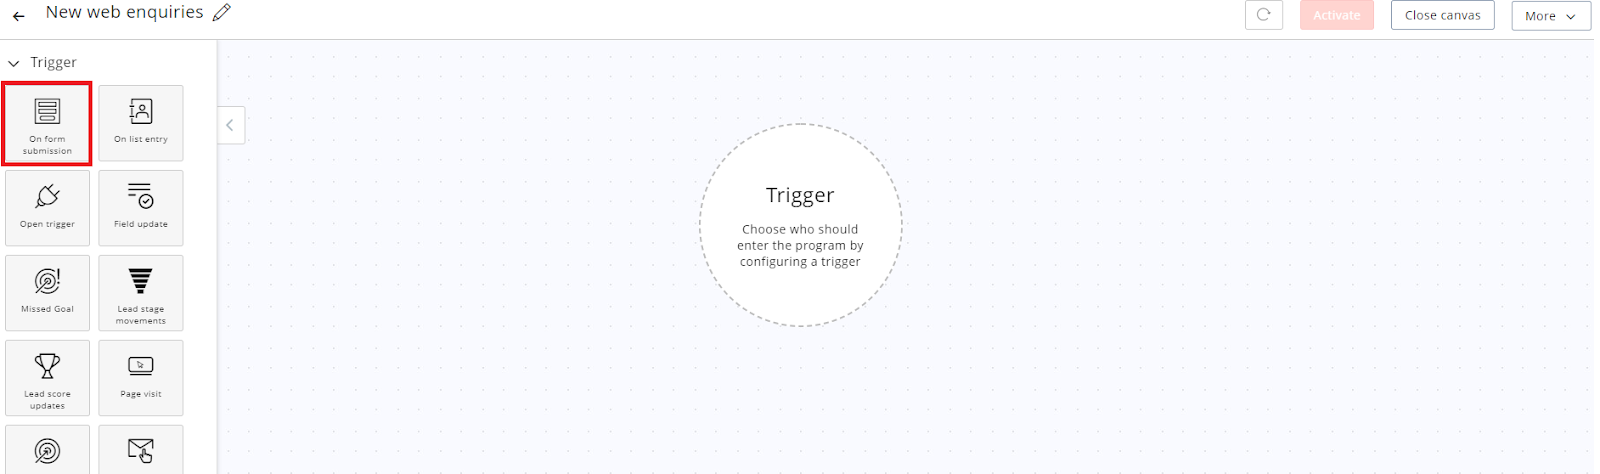
- Drag On Form Submission as your trigger to the center of the screen. And then press Select Form. In the option, select Specific Signup Forms.
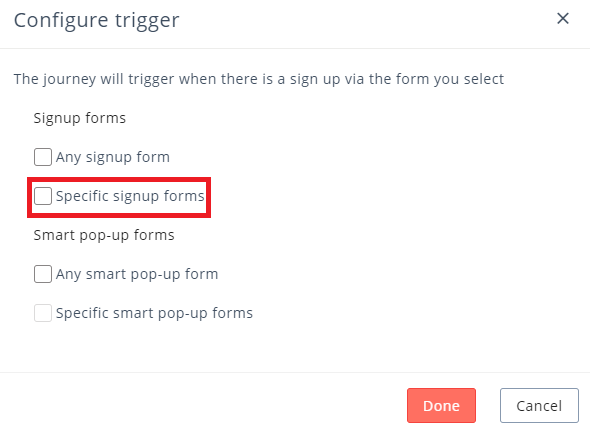
- Select your form that you just created and then press Done.
- Now we need to do some nurturing. So select the Process section on the left and drag your nurture email campaign boxes into the centre. You can use all sorts of tools in the journey such as Conditions.
- We won’t be going into building a journey here because that is a really big topic and will be part of a marketing course. Let me know if you want me to create a course to cover those topics.
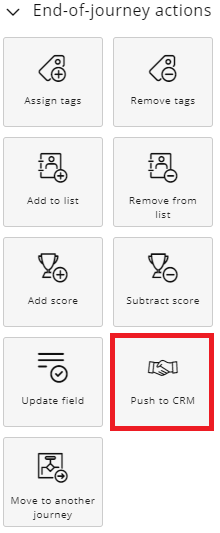
- Once you have added some process actions in your Journey, you can then either select a Zoho CRM Actions in the Process Section or in the End-of-Journey Actions. If you use it in the process, you can have different routes through the journey, some people who enter this nurture journey may not get added to the CRM if they take a route you have defined without a CRM action added to it. If you want everyone to end up in the CRM as the last action in your journey, select Push to CRM in the End-of-Journey Actions section.
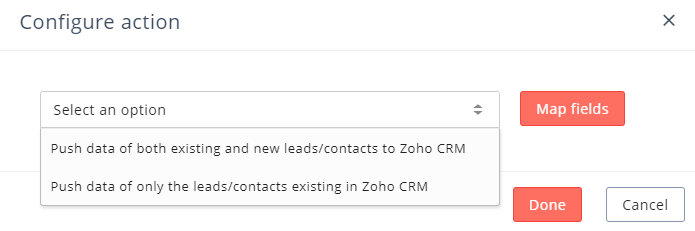
- Press Configure on the action and then select Push data to both new and existing leads / contacts in the CRM. Why? Because this journey needs to create the Lead in the CRM if it doesn’t already exist. It uses the email address to work it out.
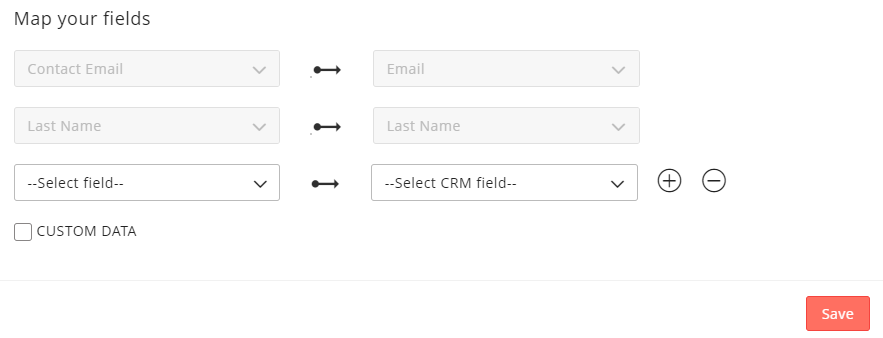
- Then press Map Fields. Then select your Account (If you don’t have one showing here, you need to integrate your CRM using the Sync Services tab in Contacts first) and then the module you want to push the data too. We are pushing to the Leads module.

- After you have done this, you need to map the fields. These are the form fields to your Zoho CRM. Press the Plus (+) to add more field mapping rows. If you want fixed values to be added to a field in the CRM, you can use the Custom Data option. Press Save once you have done all the fields for your CRM. Then press Done to get to your Journey page.
- Once you have built the journey, you can Activate it in the top right of the page. If you are still working on it, you can leave the page and the journey will be saved as a draft.
- Then fill in the form and see if it triggers a record into the journey and then into the CRM. You can see the path of people through the journey from the Journey Reports option under the Journey tab.
Bonus: Zoho Sales IQ also captures data from forms
Zoho Sales IQ is a web visitor tracking and chat app from Zoho.
If you have Zoho Sales IQ on your website and it is linked to your CRM, then you might notice that when a person fills in any form on your website, Sales IQ sees the data and creates a record in the CRM.
This is quite useful for de-anonymising people who visited your website. If a record in your CRM already exists, it won’t create a new record, it will update the existing record using the email address to work out if it is a duplicate. The updated record gets some useful information in your CRM, such as the pages they visited on your website and how long they stayed on each page. It also has some other useful features.
You might be wondering, if you have Sales IQ on your website already, why would you need to integrate the form if it’s picking up the same data automatically? Well, it isn’t! It only picks up the name and email address as well as few other minor pieces of information. It doesn’t have a field map feature and so all those lovely fields in your form will need to be pushed in using the other methods. Think of Sales IQ as providing supplementary data rather than the core data.
If you want more information on how to use Sales IQ, check out my free Zoho Sales IQ training course.
Summary
There are lots of ways to capture data from your website and even other apps and push it to the CRM. Hopefully, this has given you an idea of your options for integrating and simplifying your processes.
Here is a quick recap:
- Zoho CRM Webforms is great for simple forms and will fire it directly into your CRM. Make sure you have the fields in your CRM module first before you create the form.
- Zoho Forms is the preferred option for building custom forms and adding them to your website for capturing data. It’s got the most features and integrates well with lots of other apps.
- 3rd party form integrations to Zoho CRM are a pretty good option if you either already have the form on your website or there is a particular feature or style you like. You can integrate these custom forms in a few ways. The easiest one is a direct integration of the form to Zoho CRM if that feature is available, alternatively you can use Zoho Flow as an integration tool between the form and your CRM.
- The last solution we have looked at is using Zoho Marketing Automation or Zoho Campaigns to capture the form information and build a nurture journey from it. Once the journey has been completed then I’ve shown you how to send the data into your CRM.
There are other ways of integrating your website forms to Zoho CRM , however, those methods are more technical and less user friendly.
Have a go at integrating your website forms and Zoho CRM together and let me know if you have any feedback on this article.